What to expect
This guide is meant as a loose inspiration for a poweruser looking to switch to Linux. It showcases:
- window manager, terminal, i3status, nvim, git, fish, wallpapers and dunst configuration
- basic package manager usage
- some information about everything you need to know to really configure a power users system.
If you already know how to install Linux skip Installing and go straight to What do we need, how do we get it
If you want to see Screenshots of the results click here.
If you want to take a look at my dofiles, they are here
Getting started with the Lingo (What is all this stuff)
Linux (+-/GNU)
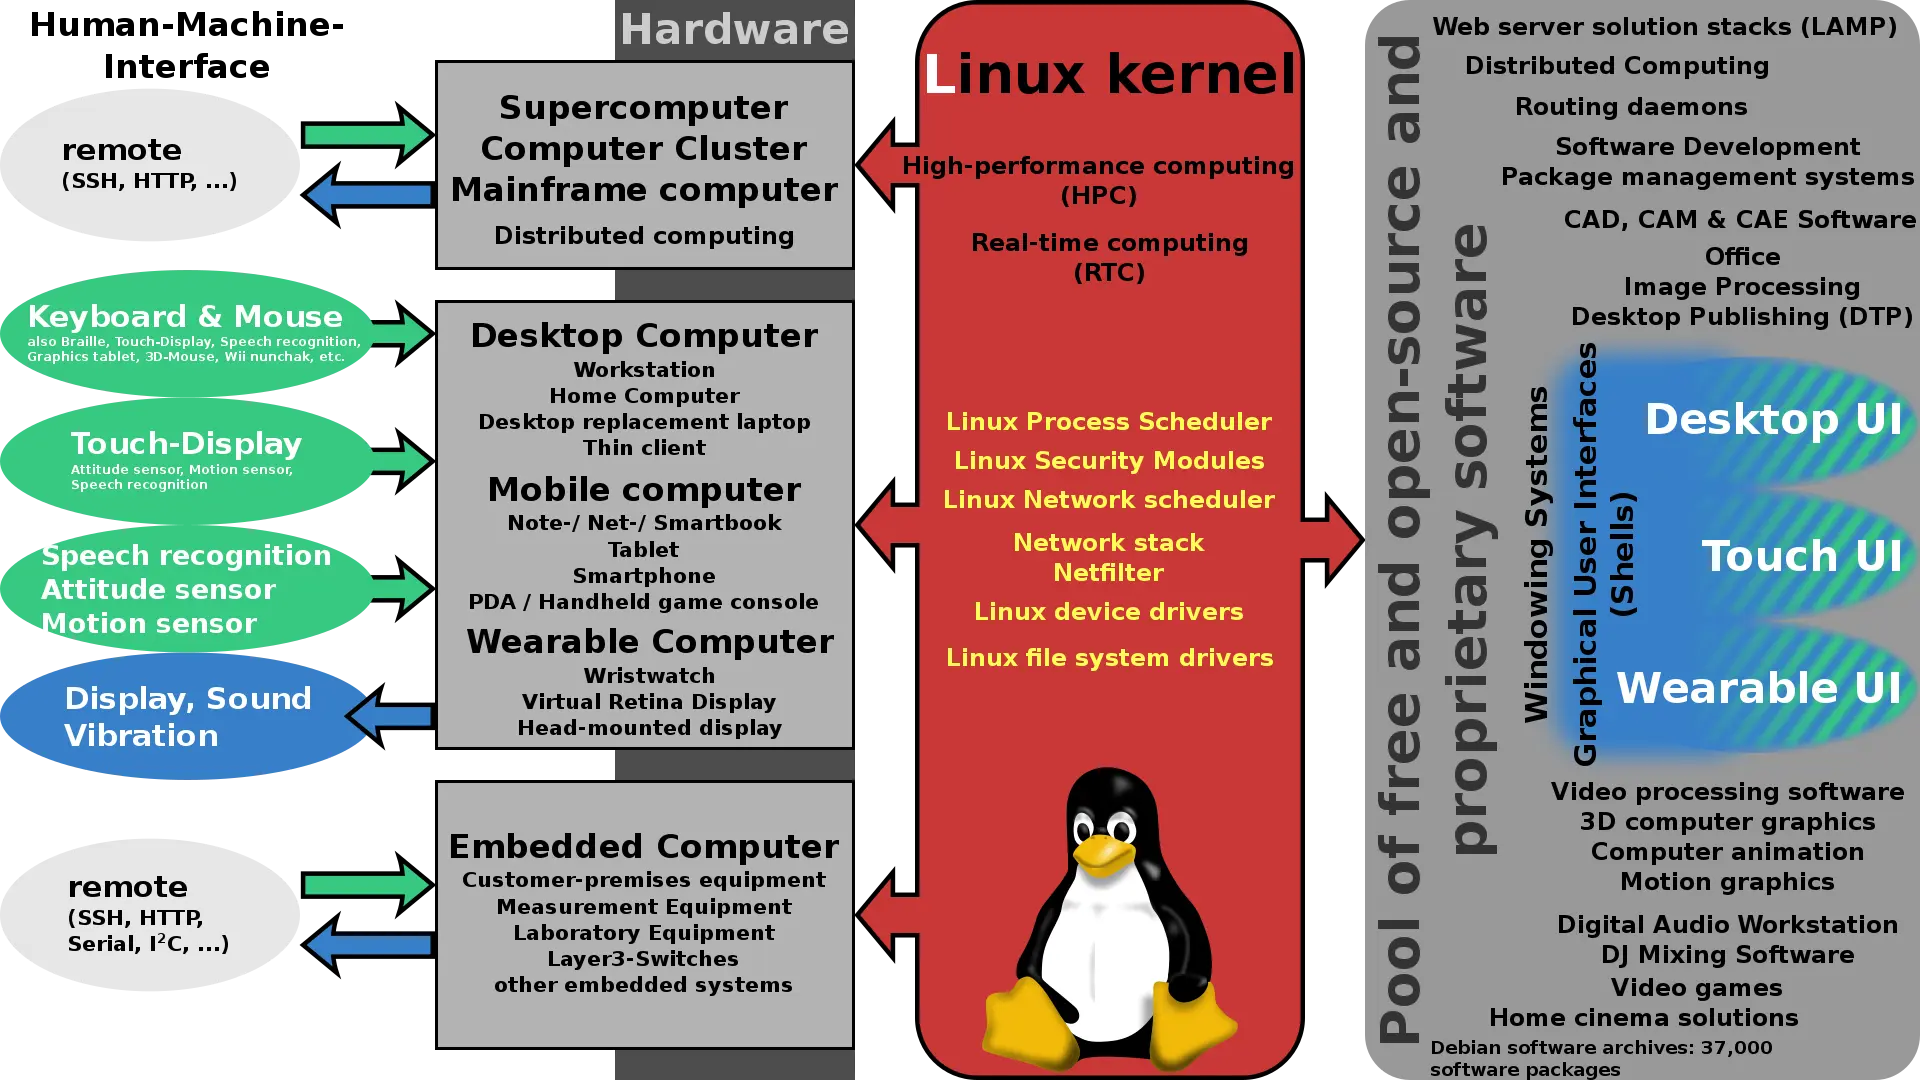
Linux is the kernel of your distro, written in C and Assembly by Linus Torvalds and thousands of contributors.
The kernel manages most of your installed drivers, allocates your resources and generally acts as an interface between soft- and hardware.
The +-/Gnu in the heading is a reference to the Linux kernel using GNU code and extensions, and therefore some people
think the Linux kernel should be named with the post-fix /Gnu or +Gnu.1
Most people use Linux as a synopsis for everything included in a distribution, such as kernel, drivers, desktop environment, window manager, shell, etc. even though Linux is just the name of the kernel. Everyone knows what you’re talking about by just calling everything Linux.
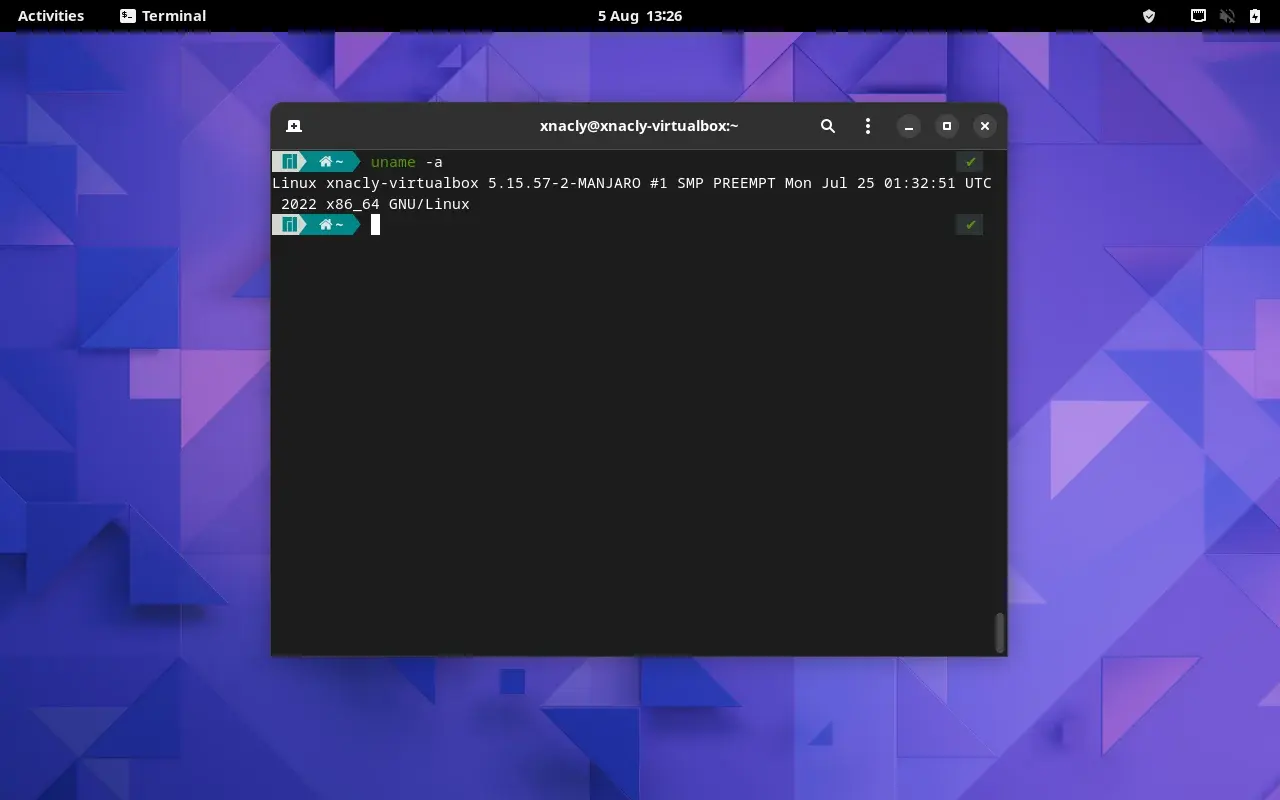
View the current kernel version and build by running
BASH1$: uname -a 2# outdated wsl kernel 3Linux THINK-**** 4.4.0-19041-Microsoft #1237-Microsoft Sat Sep 11 14:32:00 PST 2021 x86_64 x86_64 x86_64 GNU/Linux
Distribution
As hinted above a distribution is a package of software. Most Linux distribution contain the Kernel, some sort of desktop environment, a window manager, multiple Apps such as a word processor and a Webbrowser.
Some Distros are known for their gigantic package repositories like Debian and Arch, other are famous for their security like e.g. RedHat or the discontinued CentOS. There are some distros which shine by being different or minimal, such as NixOS (unconventional package managing), Artix (different init system) or Void Linux (all the before + support for musl libc implementation)
No one really knows how many distros there are, because everyone can make one and switching between them is very easy.
Package manager
A package manager is a tool which installes, removes and updates software for you. No more going to a random website and
downloading an *.exe file only to have your hdd bricked after disabling the antivirus and running the totally
legitimate vbux generator. Package managers are accessed using the terminal, but some desktop environments include
graphical user interfaces for managing packages.
A package manager such as pacman is relatively secure due to package signing and other measures which were put in place to save users from malicious software.
Almost all distributions contain a package manager, the most famous are: apt, pacman and dnf.
package manager cli examples:
 1# install a tool named neovim
 2sudo apt install neovim
 3sudo pacman -S neovim
 4
 5# check for new updates, upgrade the system
 6sudo apt update && sudo apt upgrade
 7sudo pacman -Syyu
 8
 9# remove neovim
10sudo apt remove neovim
11sudo pacman -R neovim
In this tutorial we will use Manjaro, therefore you can focus on the package manager included in
the distribution: pacman.
Desktop environment (DE) vs window manager (WM)
A desktop environment such as GNOME bundles a file manager, terminal, window manager, settings
and more into the GNOME package. Everything in it is tightly integrated and applications in the bundle often look
similar and depend on the same libraries. A de handles almost everything the user interacts with inside the GUI, such
as volume management, connecting to networks, mounting drives, theming and other.
Which distro to choose?
I love pacman and getting new software updates fast, therefore i personally use Arch Linux, which can sometimes require knowledge or some time to maintain. The distro we intend to use is based on arch Linux, but has a lot of preconfigured software, making it interesting for beginners and advanced users.
Is Manjaro better than other distros?
Manjaro is not superior or inferior to any other Linux distribution, they all do the same. Manjaro has its own package manager, themes, tools and custom Kernels.
The above was taken from the manjaro download page and i agree wholeheartedly with the first part. Roll a die and pick a random distro, it won’t really matter.
Rolling release vs Stable release (Continuous delivery)
To always have the newest and shiniest software at hand, one could decide to pick a distro with a rolling release circle2, which can at best (or worst) have several updates available a day. Like everything else RR distros have up- and downsides, you can read further about them here
Releasing on a specified time frame is defined as a continuous delivery or stable releases. Distros following this pattern have the convincing argument of stability and tested packages in their repos.
I personally never had stability issues on arch Linux and ppas annoy the shit out of me, therefore i use Arch :).
Relevant:

Reasons for Manjaro Linux
As said before, in this tutorial we will be using Manjaro due to it:
- being based on arch
- having rolling release updates
- having pacman and yay installed
- containing a fully configured system (yes bloat, idc its a beginners tutorial)
- (ofc) being Linux
Installing a Distro
This section will explain how to install manjaro linux in a virtual machine in depth
Before installing on real hardware i would recommend you to spin up a virtual machine and install Manjaro there. I will now describe a simplified way to install your operating system:
- Install Oracle VirtualBox (select
Windows hosts) - Head to the manjaro download page here, scroll down till you see the
OFFICIAL EDITIONSbadge.
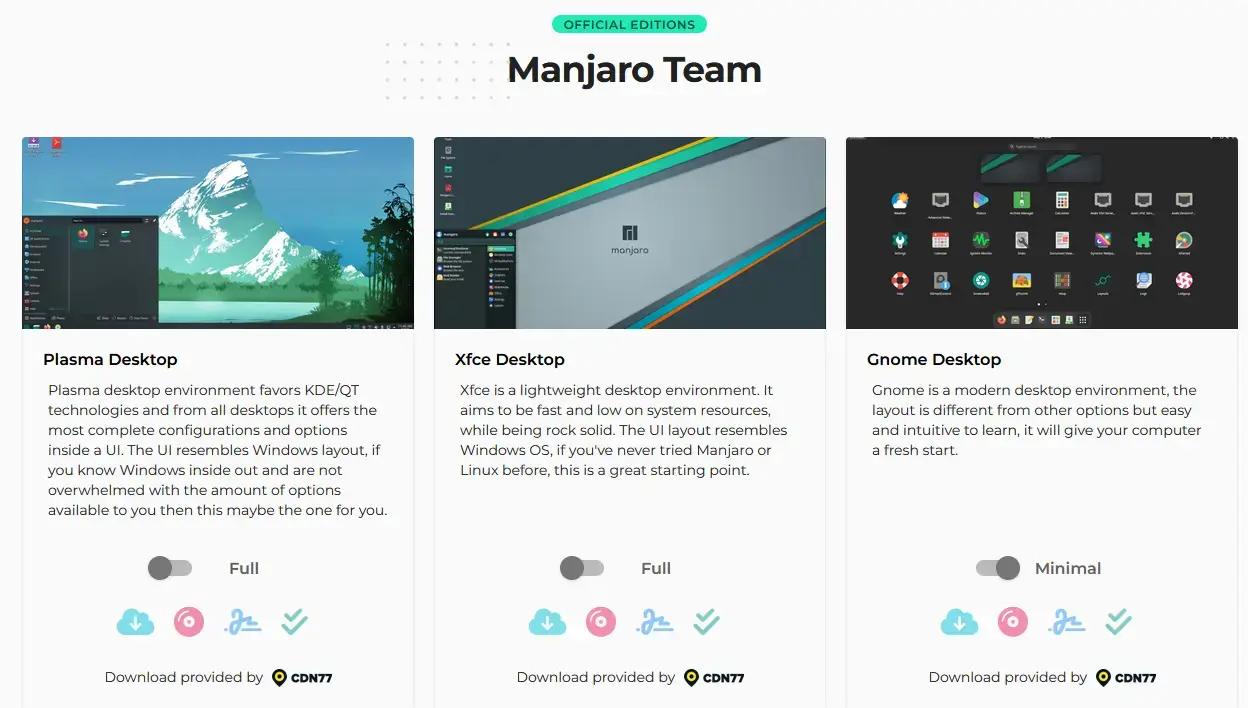
- Download a minimal version of one of the three editions (I picked gnome).
DISCLAIMER
For simplicitie’s sake, we will not check the authenticity of the downloaded image, one should however always check this before installing on bare metal.
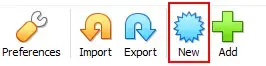
- Start Virtual Box and click on
new
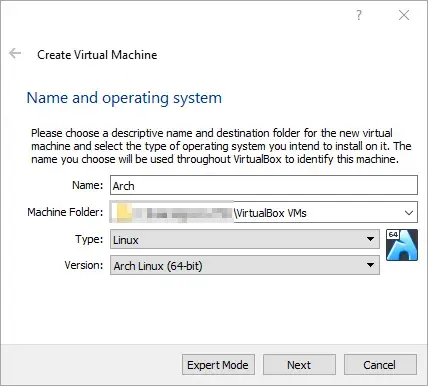
- Name your box with whatever you want, and select
Type: LinuxandVersion: Arch Linux (64-bit)
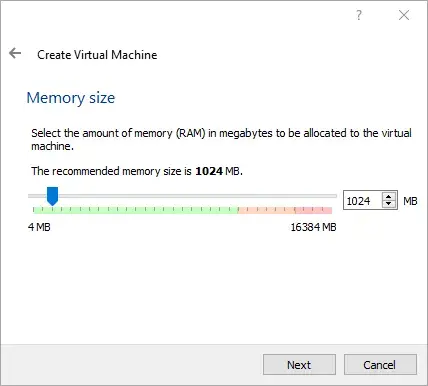
- Go with the default for
memory size:
- You want to create a new hard drive:
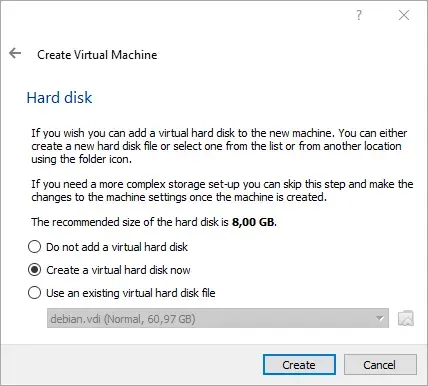
with the following attributes (you will be asked for these in the next few windows):
- VDI (VirtualBox Disk Image)
- dynamically allocated
- 25GB
Hit enter and you have your vm
Head to
Settings->System->Boot Orderand move theHard Diskoption to the top of the list (this allows the vm to boot into the operating system after installation and reboot)Go to
Settings->Storageand add a new iso by following this image:
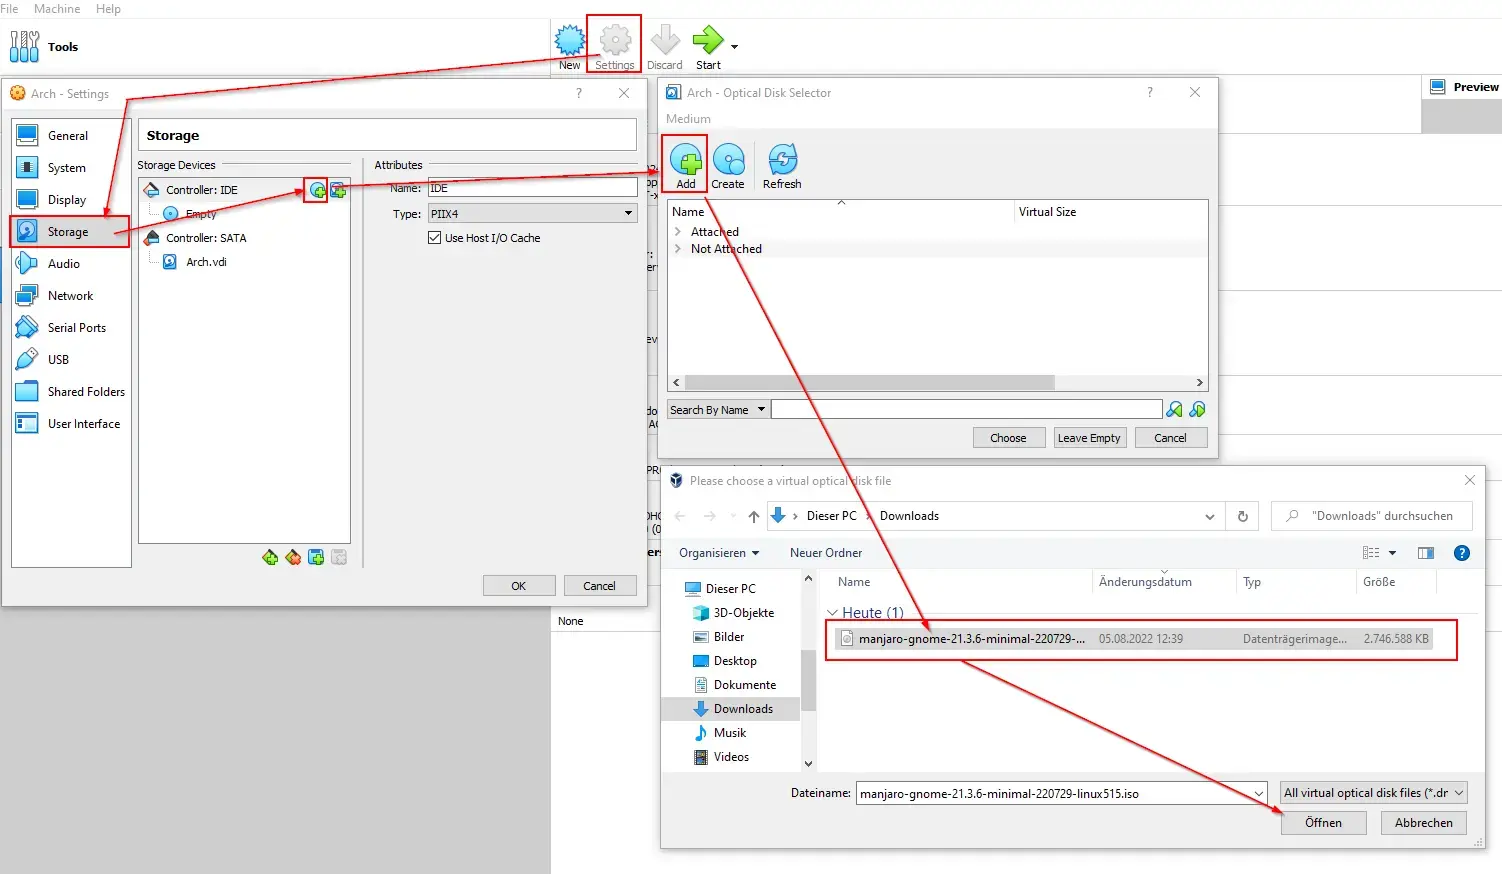
Click on
open->choose->okNow click on
startWait till the system boots (you should see some logs), click on
launch installerand go trough it.
- Location: go with the default
- Keyboard: go with your keyboard layout
- Partions: select
Erase disk - Users: fill the input fields, choose a password you can remember (for vms i always use root) and check the box which
says
Use the same password for the administrator account
- Hit install and install now in the next prompt.
- Check the
restart nowbox and click on✓Done(the vm will now reboot into the freshly installed os) - Login with your very strong password from 13. and explore the system:
What do we need, how do we get it?
Wikipedia defines a power user as:
a user of computers, software and other electronic devices, who uses advanced features of computer hardware, operating systems, programs, or websites which are not used by the average user.
A power user might not have extensive technical knowledge of the systems they use but is rather characterized by competence or desire to make the most intensive use of computer programs or systems.
I however would also mention the power users desire to get work done quickly and not have his workflow interrupted.
This can be done by making use of a window manager such as i3\[-gaps\] to:
- tile windows
- use workspaces
- auto start applications
- automatically move applications on start to a workspace
- have a fancy bar on one border of the screen
- manage your windows solely via keyboard shortcuts you configure
- have a cool r/unixporn setup
The downside of most window manager setups is the need to configure every feature you would get by using a desktop environment yourself, such as volume, wifi and wallpaper management. But don’t worry i got you covered on that full system configuration.
Application overview
- Notification daemon: dunst (lightweight and configurable)
- Window manager: i3-gaps (i3 fork with gaps)
- File explorer: Nautilus (comes with gnome)
- Shell: fish (very nice autocompletion and prompts)
- Terminal Emulator: kitty (i like the name and i need font ligatures for my neovim setup)
- Editor: Neovim (its the new and improved new and improved vi)
- Wallpaper setter: nitrogen (its minimal)
Getting Started
Installing software
Understanding pacman
Pacman has a not so beginner friendly interface (it uses flags such as -S instead of install or add), i will
therefore now follow with a simplified guide for pacman.
Always consult the man pages3 or the wiki4 for more info Pacman is very easy to use for simple and complex tasks. It’s flags are consistent and if you really think about it they make a lot of sense, it is also a lot simpler than apt, like I contrasted in Package manager.
pacman usage
1# install a package
2pacman -S firefox
3# remove a package
4pacman -R firefox
5# search a package
6pacman -Ss firefox
7# full system upgrade
8pacman -Syyu
Configuring your system
This section will explain how to install and configure certian software
.files
Dotfiles are files starting with a .. These files are hidden by default and can be viewed using the -a flag for ls:
 1$: pwd
 2/home/teo
 3
 4# (l)i(s)t directory content
 5#   [-l: long listing format]
 6$: ls -l
 7total 0
 8drwxr-xr-x 1 teo teo 4096 Aug 24 09:29 Documents
 9
10# (l)i(s)t directory content
11#   [-l: long listing format, -a: list all files (includes hidden)]
12$: ls -la
13total 16
14drwxr-x--- 1 teo  teo  4096 Aug 24 09:29 .
15drwxr-xr-x 1 root root 4096 Aug  5 09:15 ..
16-rw------- 1 teo  teo   409 Aug 23 14:31 .bash_history
17-rw-r--r-- 1 teo  teo   220 Aug  5 09:15 .bash_logout
18-rw-r--r-- 1 teo  teo  3771 Aug  5 09:15 .bashrc
19drwxr-xr-x 1 teo  teo  4096 Aug  5 09:15 .landscape
20-rw-r--r-- 1 teo  teo     0 Aug 24 09:29 .motd_shown
21-rw-r--r-- 1 teo  teo   807 Aug  5 09:15 .profile
22-rw-r--r-- 1 teo  teo     0 Aug  5 09:15 .sudo_as_admin_successful
23-rw------- 1 teo  teo  2361 Aug  5 11:26 .viminfo
24drwxr-xr-x 1 teo  teo  4096 Aug 24 09:29 Documents
In the above one can directly see a config file such as .bashrc. This file for instance contains all the configuration for bash, as the name suggests.
Freedesktop.org: XDG basedir specs
$XDG_CONFIG_HOMEdefines the base directory relative to which user-specific configuration files should be stored. If$XDG_CONFIG_HOMEis either not set or empty, a default equal to$HOME/.configshould be used. 5
Config files are often stored in files prefixed by a ., or in the .config directory, therefore they are called dotfiles..
Neovim (Editor)
To get started we need to get our hands on a powerful editor, such as vim or the new and improved vim: neovim.
Neovim is useful with its defaults, but a minimal config can help to get the most out of it.
Open a new terminal, paste the following:
1# install the neovim package using pacman as the superuser
2sudo pacman -S neovim
3# (c)hange (d)irectory to the user config which can be found at ~/.config
4cd ~/.config
5# (m)a(k)e a new (dir)ectory named nvim
6mkdir nvim
7# create a new file named init.vim in the ~/.config/nvim folder
8nvim nvim/init.vim
now you should see neovim’s interface.:
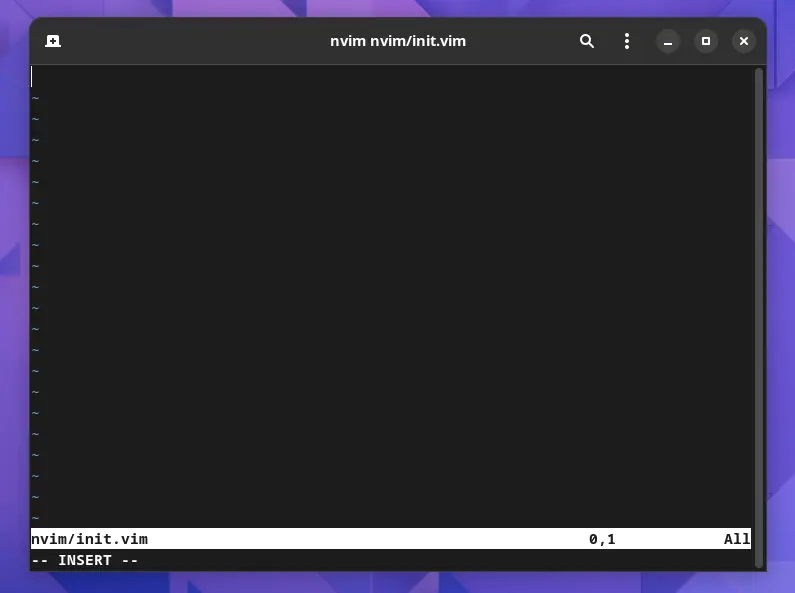
press i to switch to insert mode and paste the following configuration using ctrl+shift+v:
 1set number								" enable line numbers
 2set hidden 								" hide buffers
 3syntax on                               " Enables syntax highlighing
 4set nowrap                              " Display long lines as just one line
 5set encoding=utf-8                      " The encoding displayed
 6set fileencoding=utf-8                  " The encoding written to file
 7set ruler								" Show the cursor position all the time
 8set cmdheight=2                         " More space for displaying messages
 9set iskeyword+=-                      	" treat dash separated words as a word text object
10set splitbelow                          " Horizontal splits will automatically be below
11set splitright                          " Vertical splits will automatically be to the right
12set t_Co=256                            " Support 256 colors
13set conceallevel=0                      " So that I can see `` in markdown files
14set tabstop=4                           " Insert 2 spaces for a tab
15set shiftwidth=4                        " Change the number of space characters inserted for indentation
16set smarttab                            " Makes tabbing smarter will realize you have 2 vs 4
17set expandtab                           " Converts tabs to spaces
18set smartindent                         " Makes indenting smart
19set autoindent                          " Good auto indent
20set showtabline=2                       " Always show tabs
21set noshowmode                          " We don't need to see things like -- INSERT -- anymore
22set updatetime=300                      " Faster completion
23set timeoutlen=500                      " By default timeoutlen is 1000 ms
24set formatoptions-=cro                  " Stop newline continution of comments
25set termguicolors						" allow vim to change term colors
26set incsearch 							" enable incremental search
27set smartcase							" searches case insensitive until an uppercase character is supplied
28set nobackup							" disables backup files
29set spell!								" spellchecking
30set spelllang=en,de						" set languages for spellchecking
Now hit Esc and type :w and after that :source % to reload the neovim configuration
Escaping vim
there are several ways to exit vim:
Method What happens Esc:q!orZQexit and discard Esc:worZZexit and save
Plugins (fuzzy file finder, nerd tree)
Add the following to your vim config (~/.config/nvim/init.vim) to install vim plug (a package manager for vim).
1" installs vim plug if it isnt already installed
2if empty(glob('~/.config/nvim/autoload/plug.vim'))
3 silent !curl -fLo ~/.config/nvim/autoload/plug.vim --create-dirs
4 \ https://raw.githubusercontent.com/junegunn/vim-plug/master/plug.vim
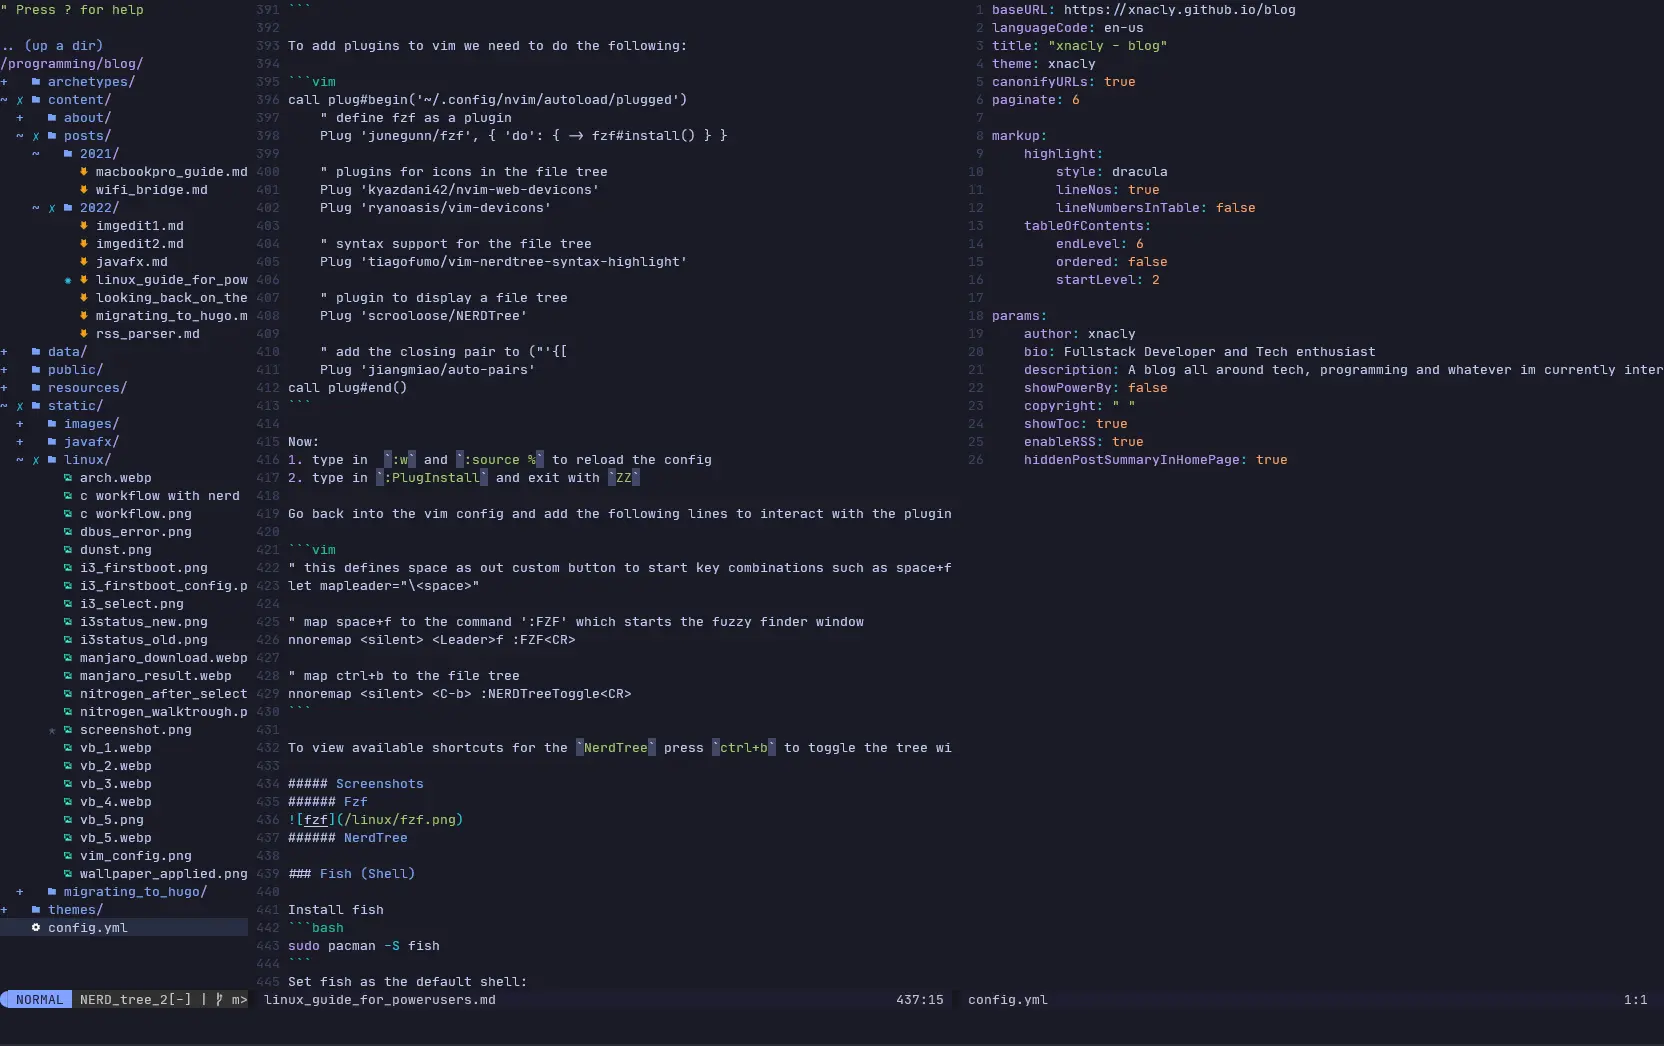
5endifTo add plugins to vim we need to do the following:
 1call plug#begin('~/.config/nvim/autoload/plugged')
 2    " define fzf as a plugin
 3    Plug 'junegunn/fzf', { 'do': { -> fzf#install() } }
 4
 5    " plugins for icons in the file tree
 6    Plug 'kyazdani42/nvim-web-devicons'
 7    Plug 'ryanoasis/vim-devicons'
 8
 9    " syntax support for the file tree
10    Plug 'tiagofumo/vim-nerdtree-syntax-highlight'
11
12    " plugin to display a file tree
13    Plug 'scrooloose/NERDTree'
14
15    " add the closing pair to ("'{[
16    Plug 'jiangmiao/auto-pairs'
17call plug#end()
Now:
- type in
:wand:source %to reload the config - type in
:PlugInstalland exit withZZ
Go back into the vim config and add the following lines to interact with the plugins we just installed.:
1" this defines space as out custom button to start key combinations such as space+f to fuzzy search
2let mapleader="\<space>"
3
4" map space+f to the command ':FZF' which starts the fuzzy finder window
5nnoremap <silent> <Leader>f :FZF<CR>
6
7" map ctrl+b to the file tree
8nnoremap <silent> <C-b> :NERDTreeToggle<CR>
To view available shortcuts for the NerdTree press ctrl+b to toggle the tree window and press ? to view help.
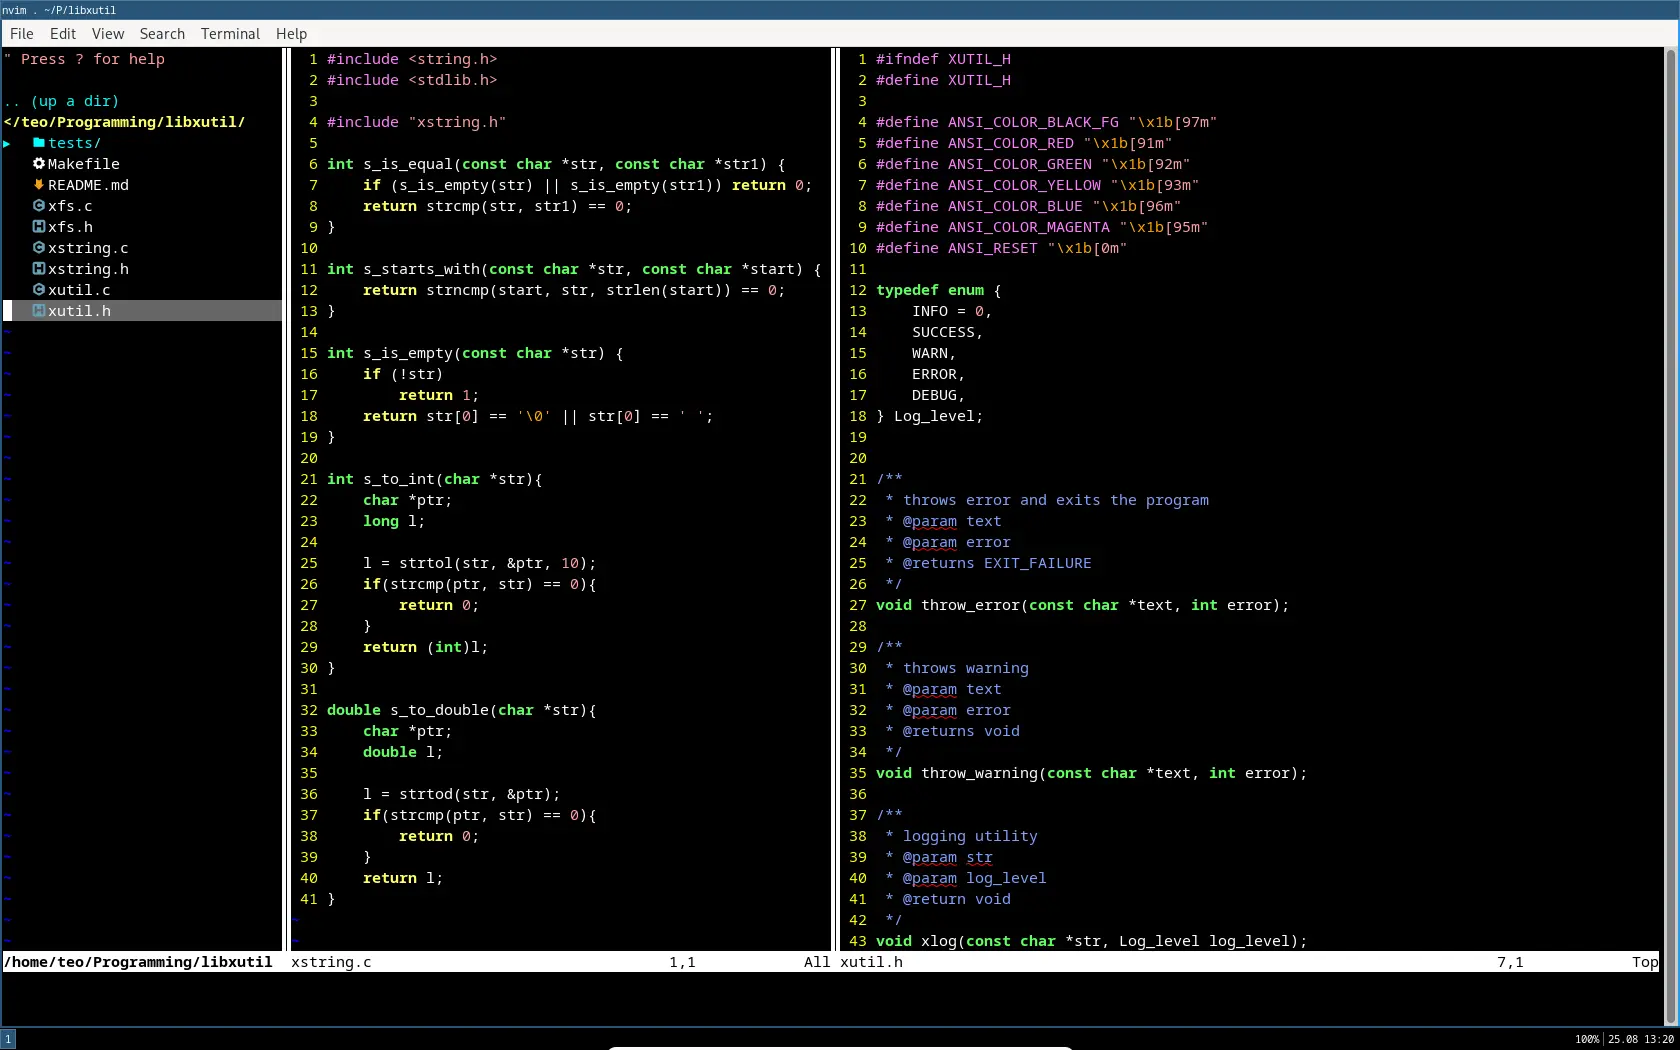
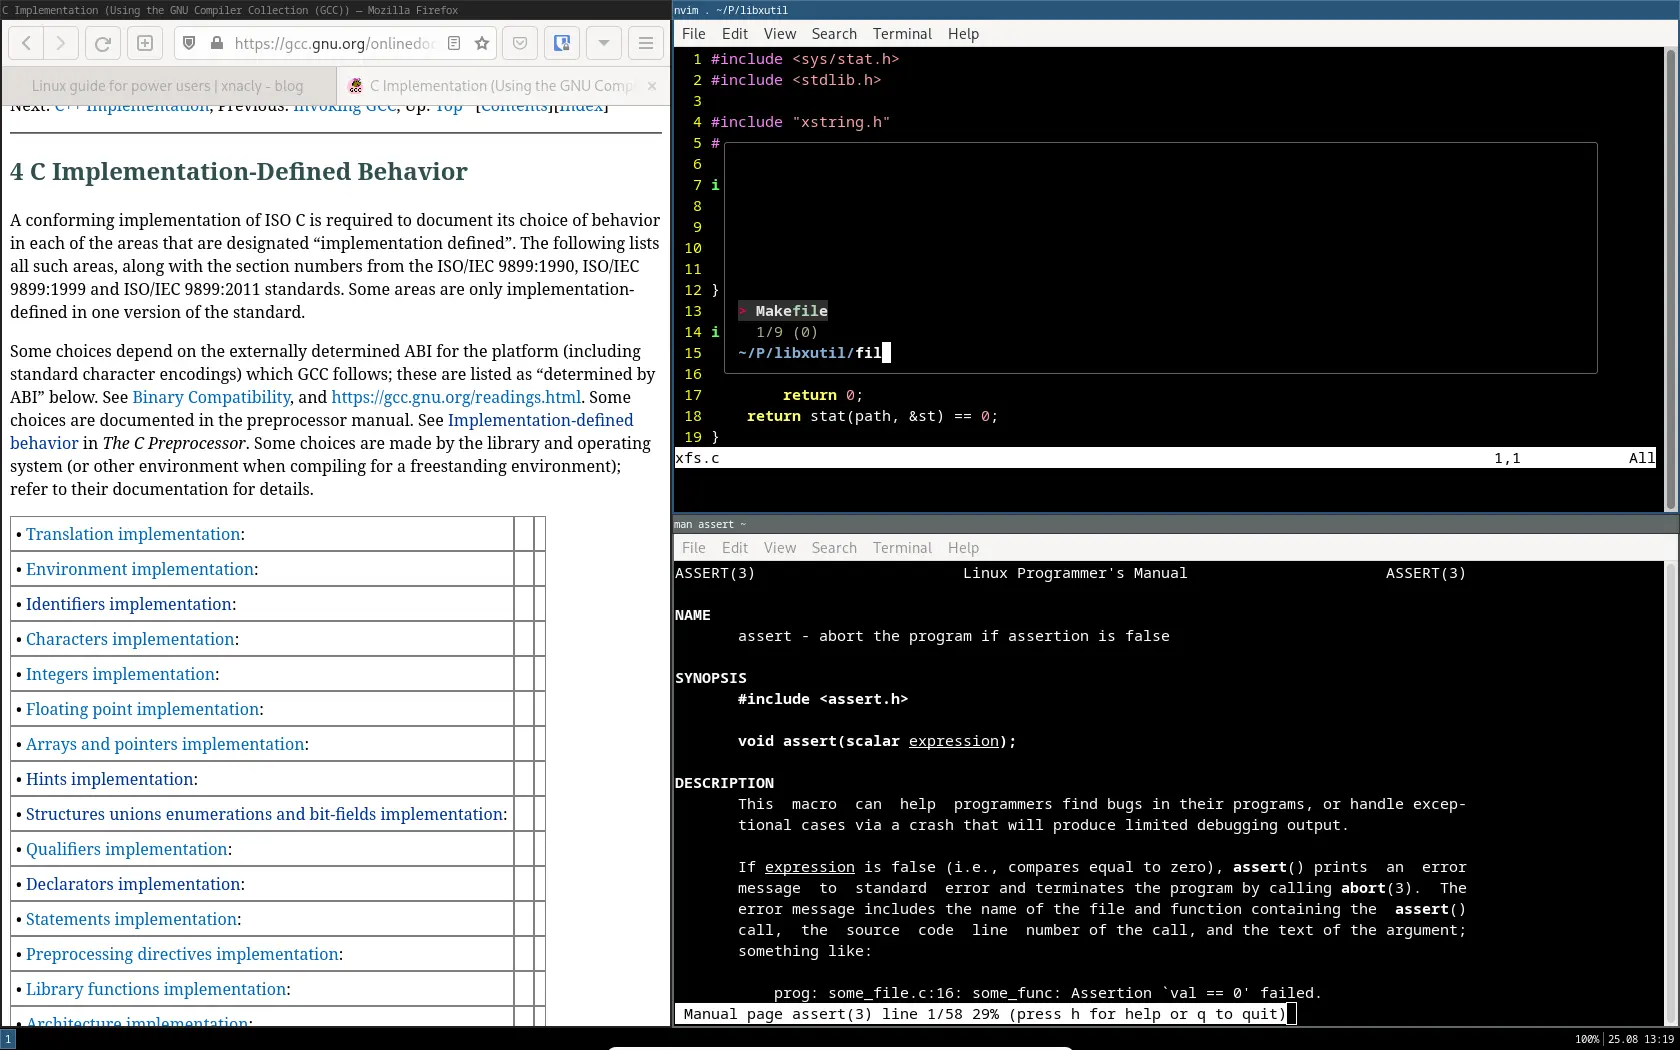
Screenshots
Fzf
NerdTree
Fish (Shell)
Install fish
1sudo pacman -S fishSet fish as the default shell:
1chsh -s /usr/bin/fishGit (Version control tool)
Install git:
1sudo pacman -S gitGo to github
- sign in or sign up
- click on your profile picture
- click on settings.
- now navigate to
Settings->Developer Settings->Personal access tokens->Generate new token
- name it
manjar-vm - click on the
repocheckbox - scroll to the bottom and click on generate token.
- copy the token into a notepad (should be prefixed with
ghp_)
To push or pull from github, one must first authenticate to their service. This needs to be done using the git config.6
 1# tell git to store your credentials indefinitly
 2git config --global credential.helper store
 3# set your username exactly as the username you selected on github (replace xnacly with your username)
 4git config --global user.name "xnacly"
 5# set your email exactly as the email you selected on github (replace with your username)
 6git config --global user.email "47723417+xNaCly@users.noreply.github.com"
 7
 8# to check if everything worked, run:
 9git config --global --list
10# should spit this out:
11# user.name=xnacly
12# user.email=47723417+xNaCly@users.noreply.github.com
Now go to github/new repo to create a new private repo
- name it
manjaro vm test - click on
Private - scroll down and create your repo.
- copy the repo url from the blue box (
https://github.com/<username>/test.git)
1# replace <username> with your github username
2# You will be prompted for your email and your password,
3# input the email used to sign in to github,
4# as the password you will need to use the access token we generated before.
5git clone https://github.com/<username>/test.git
6# cloning into 'test'...
7# Username for 'https://github.com':
8# Password for ... :
9# warning: You appear to have cloned an empty repository
You are now authenticated to github. Test your config by creating a readme and pushing it to master:
1echo "# Test repo" > README.md
2git add -A
3git commit -m "init commit"
4git push
Now go to the repo and refresh by pressing Ctrl+r and see your changes have been pushed into master.
i3 (Window manager)
To display anything and manage our windows, we will need the i3gaps group:
1sudo pacman -S i3 dmenu1[sudo] password for teo:
2:: There are 5 members in group i3:
3:: Repository community
4 1) i3-gaps 2) i3-wm 3) i3blocks 4) i3lock 5) i3status
5
6Enter a selection (default=all):Input your password and hit Enter.
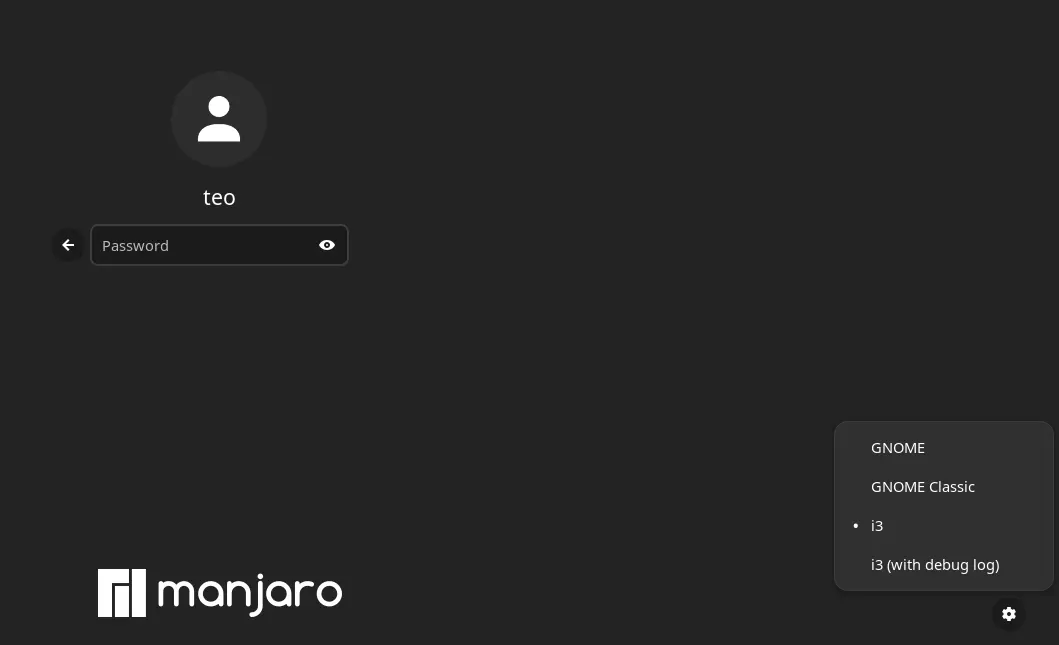
Now logout and select i3:
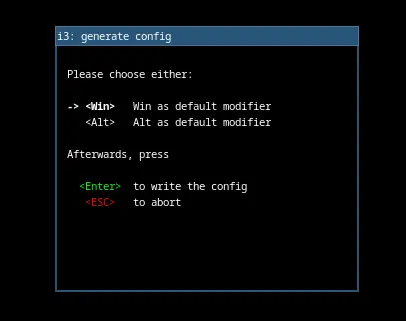
After boot you will be prompted to generate a config, hit Enter.
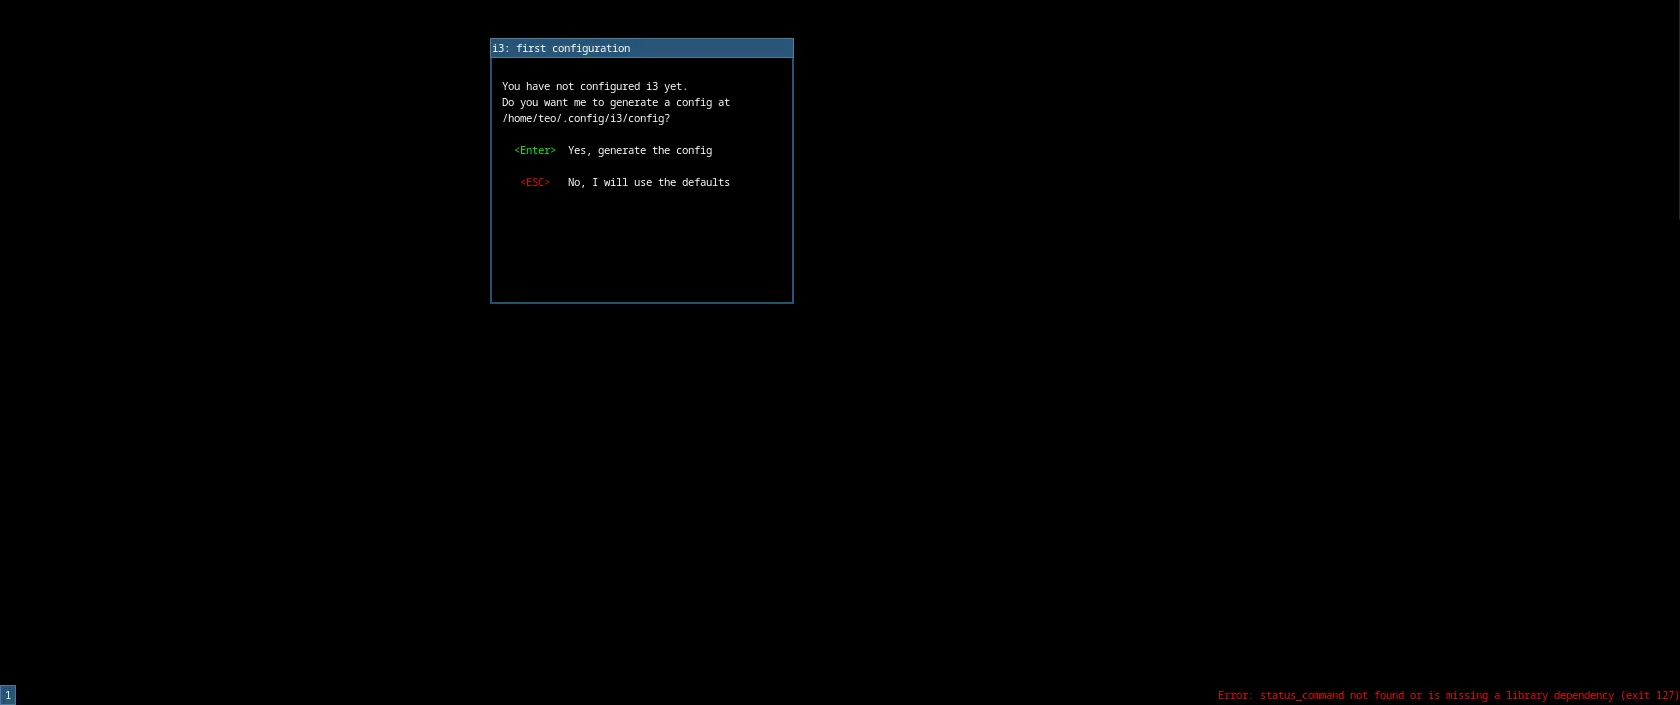
Select the default key as the Super-Key, it should be the Win button. Hit Enter to write the config.
i3 has a pretty unique keymap, here are the most basics ones:
| Keycombination | what it does |
|---|---|
Super+Enter | open a terminal |
Super+Shift+q | close a window |
Super+d | start application launcher |
Super+Shift+c | reload i3 config |
Super+Shift+r | reload i3 |
Super+Shift+e | exit i3 prompt |
Super+[0-9] | switch to workspace 1-10 |
Super+Shift+[0-9] | move focused window to workspace 1-10 |
See the i3 docs for keybindings and configuration help, also see my i3 config for inspiration.
i3status (i3 status bar)
i3status is very easily configurable.
1# (c)hange (d)irectory to the user config which can be found at ~/.config
2cd ~/.config
3# (m)a(k)e a new (dir)ectory named i3status
4mkdir i3status
5# open the config in neovim
6nvim i3status/i3status.conf
Now in neovim, paste the following:
 1general {
 2        interval = 1
 3}
 4
 5order += "volume master"
 6order += "tztime local"
 7
 8tztime local {
 9        format = "%d.%m %H:%M "
10}
11
12volume master {
13        format = "%volume"
14        format_muted = "--%"
15        device = "pulse"
16}
This config updates every 1 second and only displays the time, date and volume.
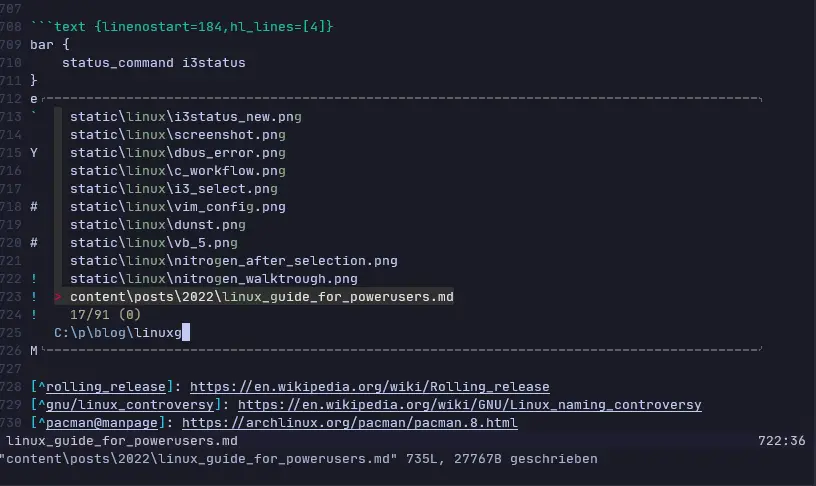
To apply this configuration, we will need to change the configuration file i3status looks at. To do this, we need to change the following in ~/.config/i3/config by supplying the file path to neovim, like so:
1nvim ~/.config/i3/config
184bar {
185	status_command i3status
186}
to

184bar {
185	status_command i3status -c ~/.config/i3status/i3status.conf
186}
Kitty (Terminal Emulator)
Kitty is very fast and full of features.
Install kitty:
1sudo pacman -S kittyConfigure Kitty by opening ~/.config/kitty/kitty.conf using neovim and pasting the following in the file:
 1font_family                 JetBrainsMono Nerd Font         # configure font family
 2bold_font                   auto
 3italic_font                 auto
 4bold_italic_font            auto
 5font_size                   13.0
 6window_padding_width        5                               # space between window borders and text in terminal
 7enable_audio_bell           no                              # disable loud alarm when misinput happens
 8remember_window_size        no
 9initial_window_width        82c
10initial_window_height       24c
11confirm_os_window_close     0                               # kitty asks you if you reall want to close it if a process is running, this disables the prompt
To replace the default terminal with kitty, open ~/.config/i3/config with neovim:
- Search for
i3-sensibleby pressing/i3-sensiblein normal mode - Replace
i3-sensible-terminalwith kitty
44# Use Mouse+$mod to drag floating windows to their wanted position
45floating_modifier $mod
46
47# start a terminal
48bindsym $mod+Return exec i3-sensible-terminal
49
50# kill focused window
51bindsym $mod+Shift+q kill44# Use Mouse+$mod to drag floating windows to their wanted position
45floating_modifier $mod
46
47# start a terminal
48bindsym $mod+Return exec kitty
49
50# kill focused window
51bindsym $mod+Shift+q killDunst (Notification daemon)
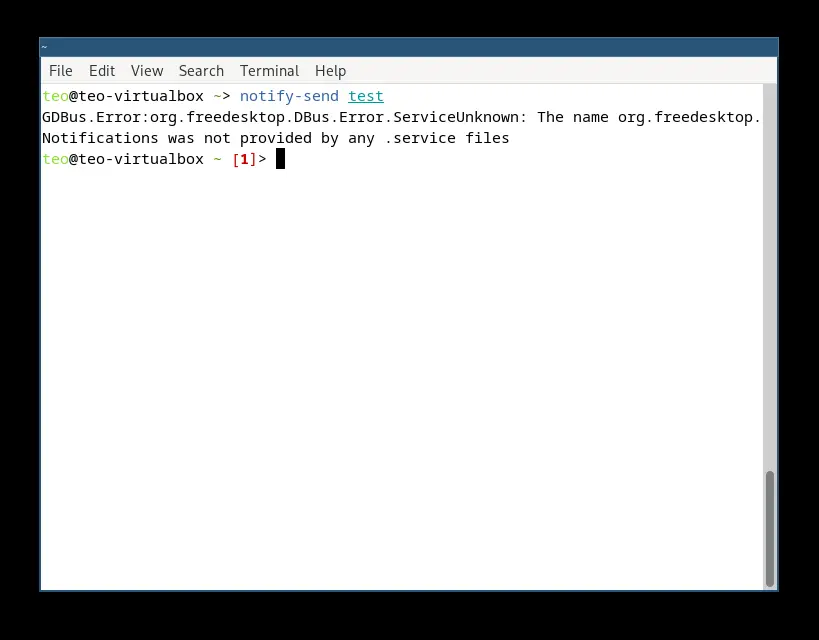
Gnome ships a cli utility which we will use to test our notification daemon. Running notify-send "test" on our current system results in an GDBus error.
To fix this we will have to install dunst.:
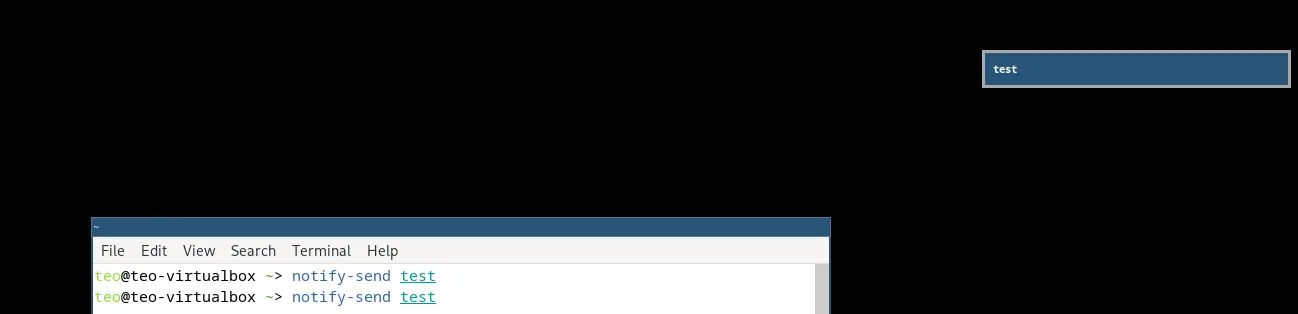
1sudo pacman -S dunstSending a new notification will now result in a small window popping up on our screen for a few seconds:
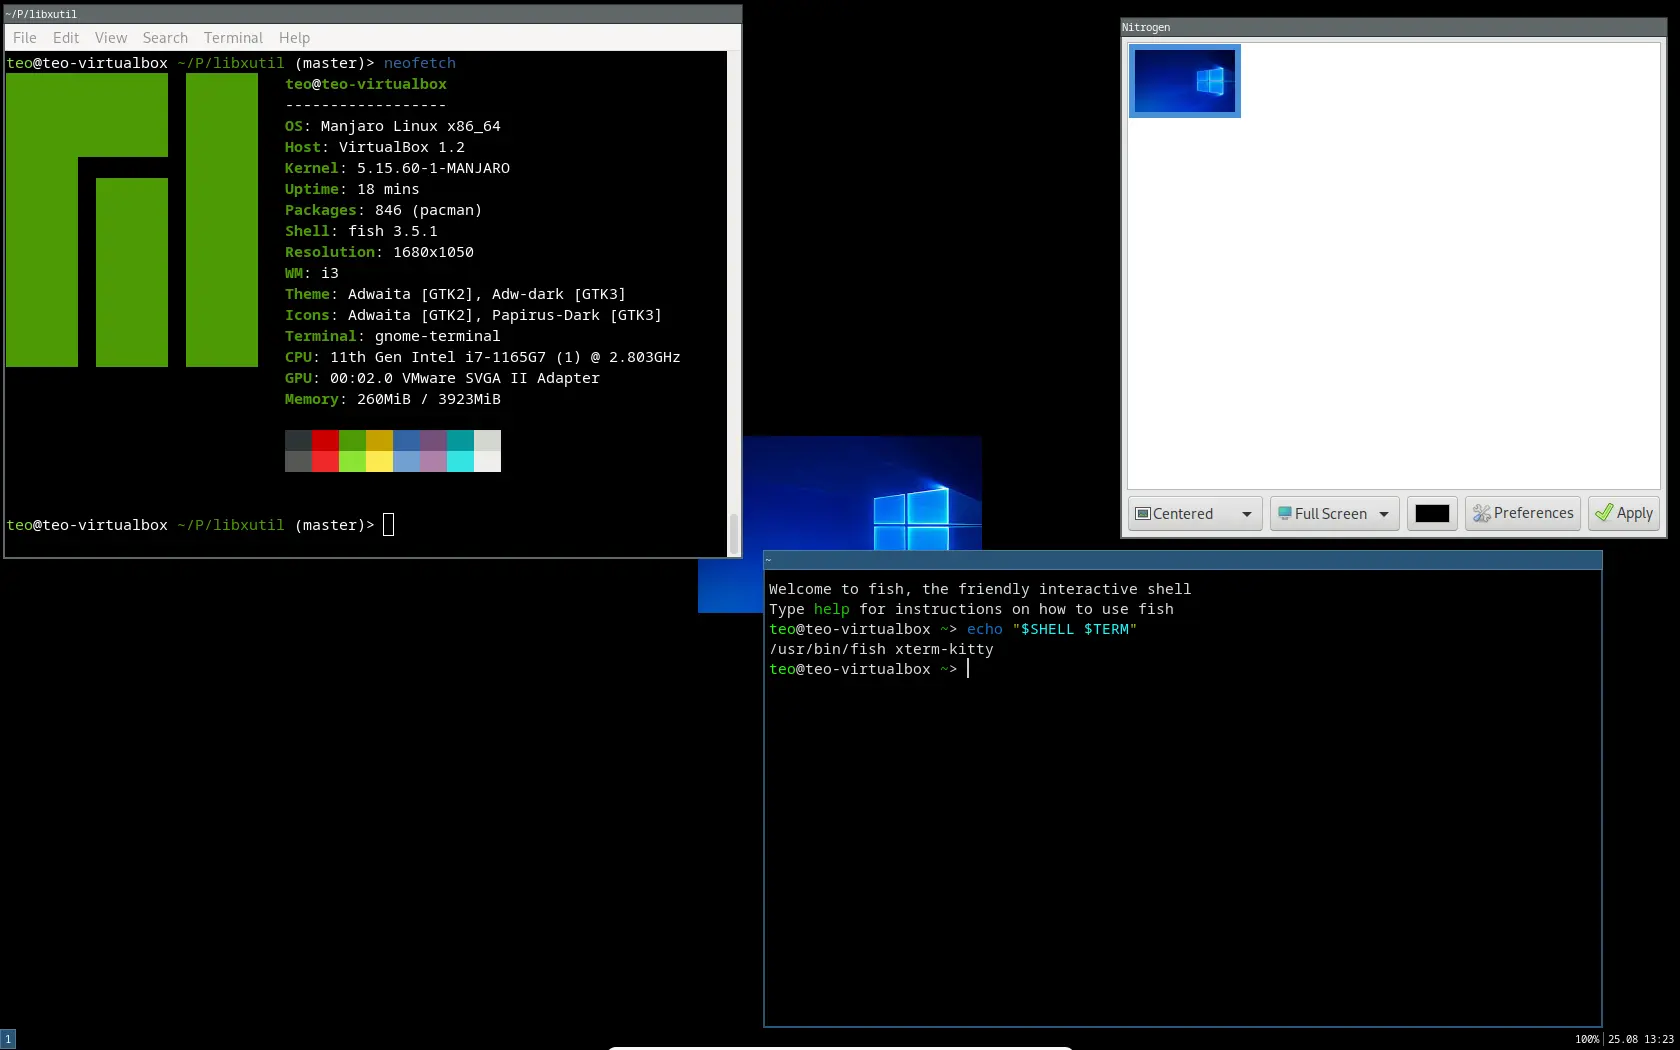
Nitrogen (Wallpaper setter)
Setting a Wallpaper is easier than all the technical incompetent people on r/PcMasterRace say. Just install nitrogen, add your picture, done.
1sudo pacman -S nitrogen- Download an image to the
~/Picturesdirectory - Add the
~/Picturesdirectory as a source to nitrogen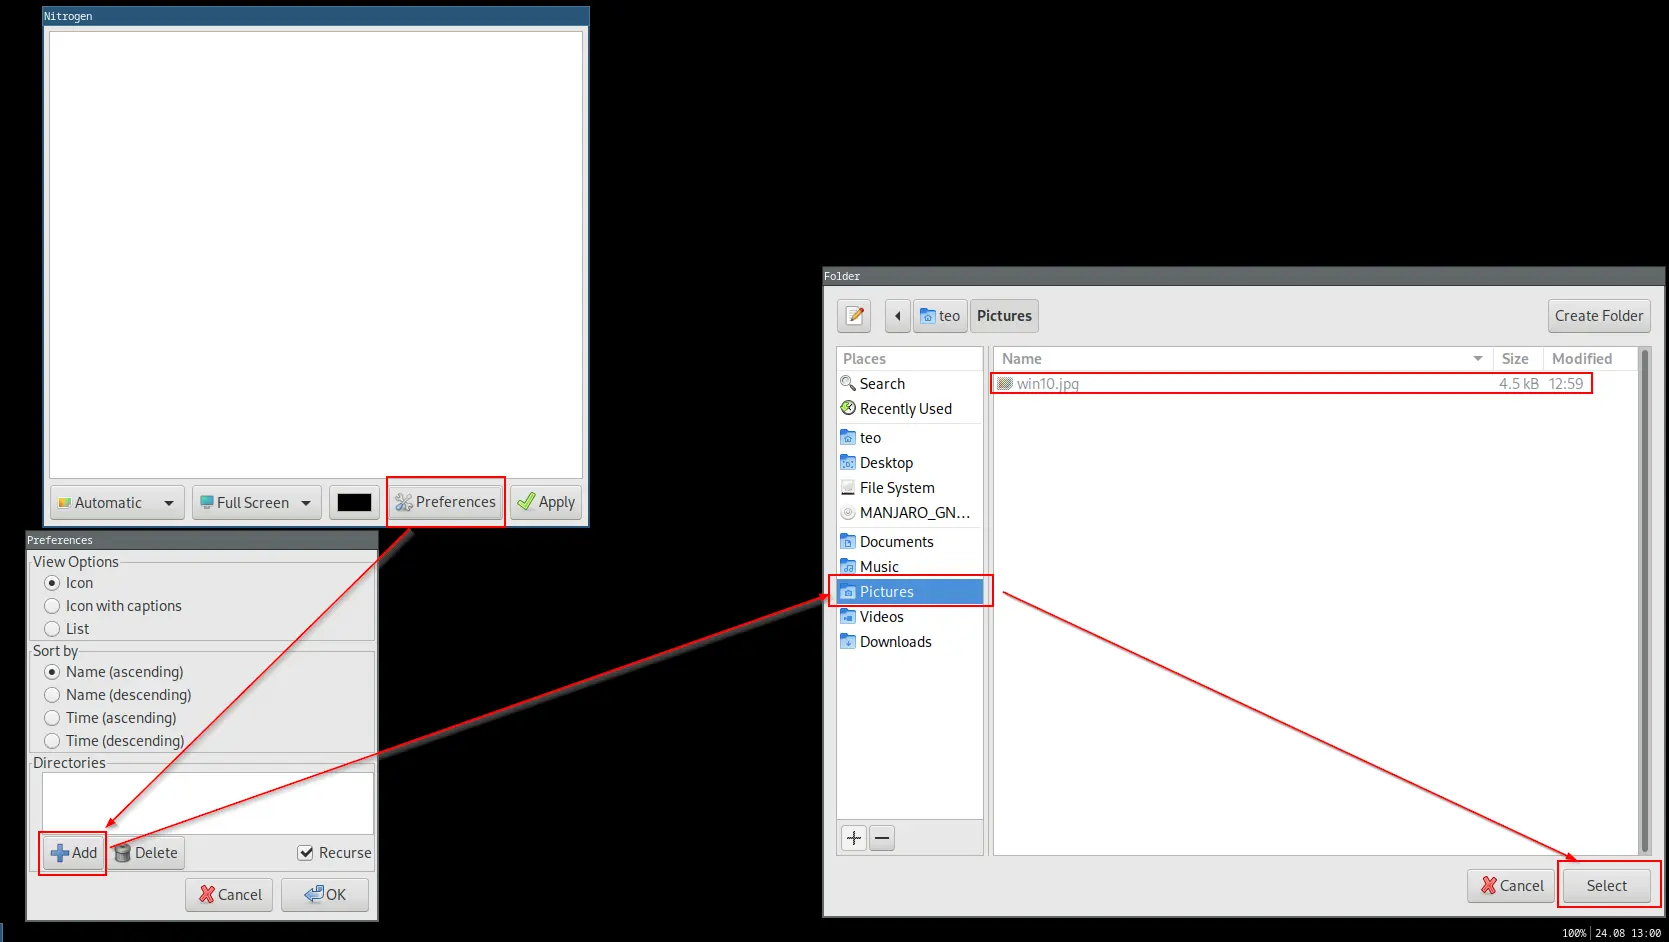
- Click on the now added image (1), select the prefered alignment option (2) and click
apply(3)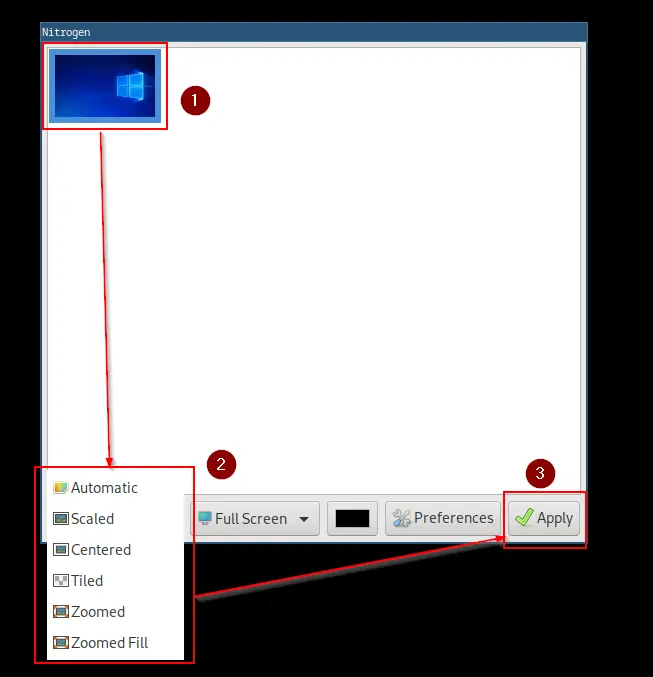
- Done.

Warning
This configuration is not permanent, every restart will require you to set your wallpaper again.
To prevent the walllpaper reset we can read the nitrogen manpage7, which explains the --restore option. To use this option and let nitrogen start on boot, we will edit our i3 config.:
1nvim ~/.config/i3/config- Press
Shift+gto jump to the last line of the file. - Now press
oto switch into insert mode in the line below. - We will now insert a
exec --no-startup-idstatement, read more about it here8
184bar {
185	status_command i3status
186}
187exec --no-startup-id nitrogen --restore
Your wallpaper will now be restored on boot.
Wrapping up.
After reading through this guide and following each step, you can now:
- understand the difference between a distro and the kernel
- install linux in a virtual machine
- use a package manager
- use basic vim
- understand the basics of the unix file system
- use a floating window manager
- use git to version your files
- configure software (i3, vim)
If there is anything wrong or you are having questions just create a new issue here
I will some day follow up on this and make a ricing guide, but until now you should be able to evolve your workflows and get comfy using i3.
I appended some Screenshots to visualise the result of this guide.
Screenshots