Overview
Tip
As always, text in between <> is meant to be replaced with your configuration / content.
For example (in python)
1print("coding is <emotion>")You can replace this however you want.
1print("coding is fun")After we got this out of the way.
I’ll now explain the connection between Github and git: We first need to understand what exactly git is.
Git is a versioning tool, i.e. you upload changes you made to a project to have a kind of backup. You can use git to go back to a previous backup.
commit: a backup, a part of the project, a version, a revisionrepository: a project or a collection of backupsremote: the origin / url of the repository
Git is the tool that allows you to create commits, jump back to older commits and upload them. Github is the website that allows you to create and host repositories, manage them and much more, see here.
Many people, including myself, use Github to collaborate and share code with the world.
Danger
This guide requires git to be installed on your system, download the installer from here.
All the following commands will need to be ran in the powershell or the cmd on windows or in the terminal on linux and hit enter.
- to access the command line on windows you can hit
WINDOWS+Rto open the run prompt, now typecmdand hit enter. - on linux just search for the terminal, you’ll find it
How to authenticate
To safely interact with out repository (which is hosted on github) from our local machine, we need to authenticate.
Warning
A requirement for the following is a github account, if you dont have one yet go ahead and sign up on github!Lets go through a few settings and generate a token, which we will use to tell github its us whos trying to update the repositories:
Sign up for github or log into github
Click on the profile picture on the top right:
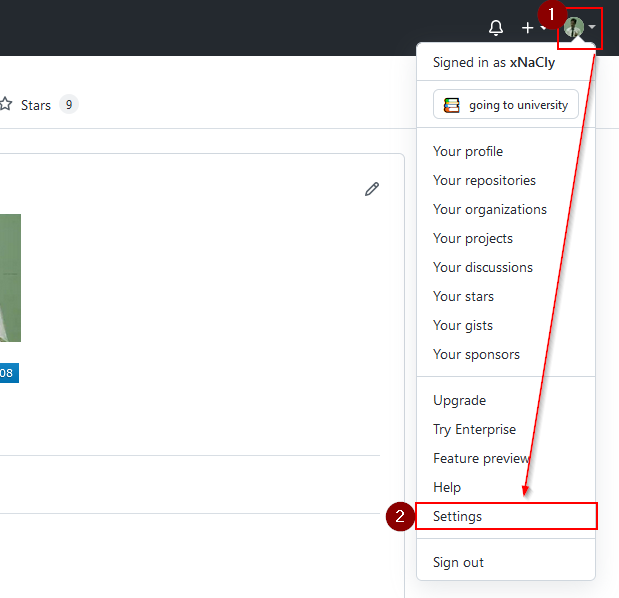
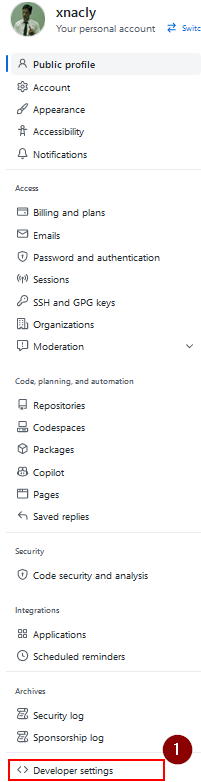
After getting into the settings we now scroll all the way down and click on developer settings:
Now we click on the personal access tokens toggle and select the
Token (classic)->Generate new token (classic)option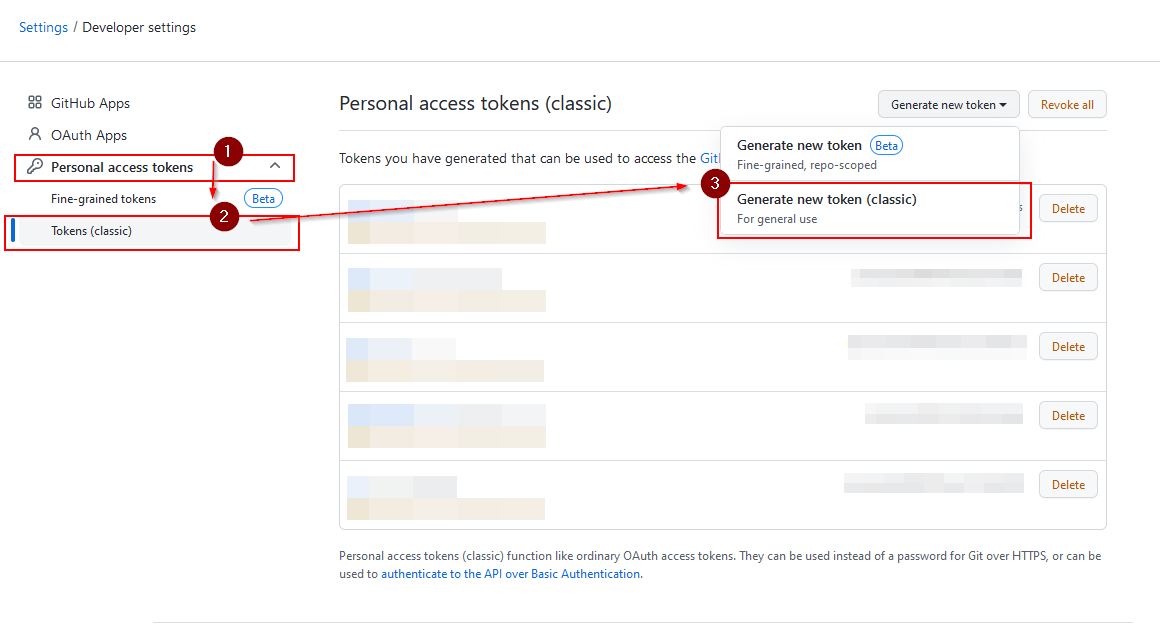
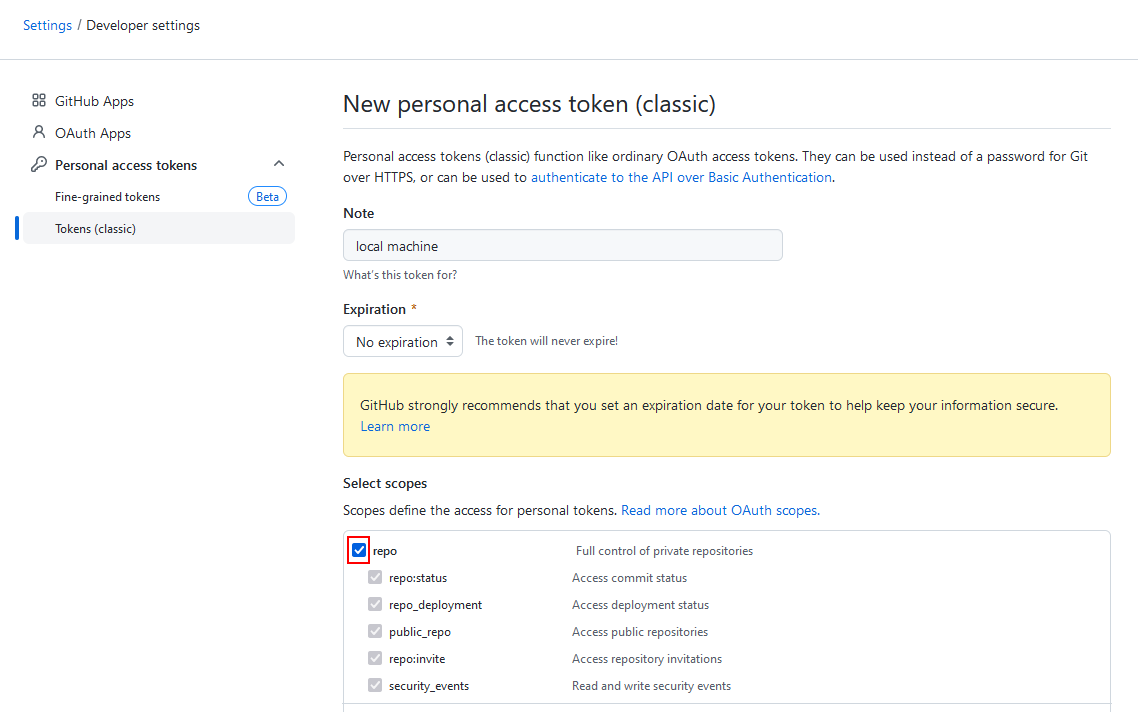
In the next menu we input the name of the token (here:
local machine), afterwards we set the expiration to none (github recommonds not setting this option, even though its very convient)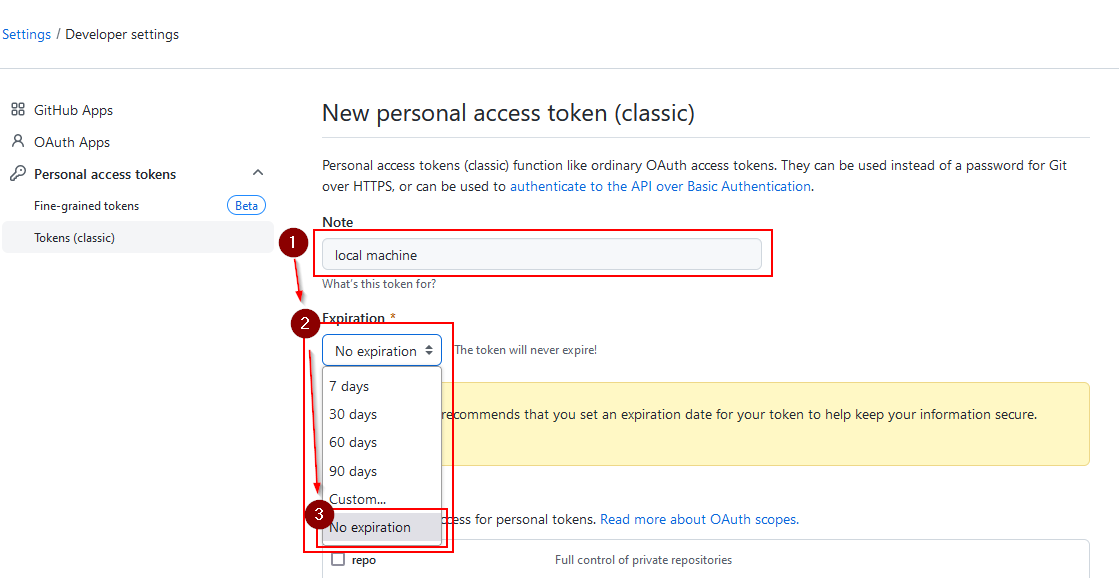
The next step is to select the permissions the token will hold (for this example we just allow read and write to repositories, note the small red box):
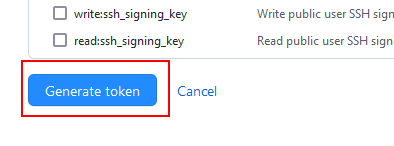
To finally create the token, scroll all the way down and hit the big generate now button:
Copy the created token by clicking on the button right next to the token
The 9th step contains a lot of stuff:
Open a terminal and type the following commands:
 1# tell git to store your credentials indefinitly
 2git config --global credential.helper store
 3
 4# set your username exactly as the username you selected on github
 5# (replace <username> with your username)
 6git config --global user.name "<username>"
 7
 8# set your email exactly as the email you selected on github (replace with your username)
 9git config --global user.email "<example@example.com>"
10
11# view if everything is stored:
12git config --global --list
13# should output:
14# user.name=<username>
15# user.email=<example@example.com>
Creating a new repository on github
- Navigate to your GitHub homepage (here)
- Click on the profile picture in the top right corner and select
Your repositoriesin the newly opened drop-down menu: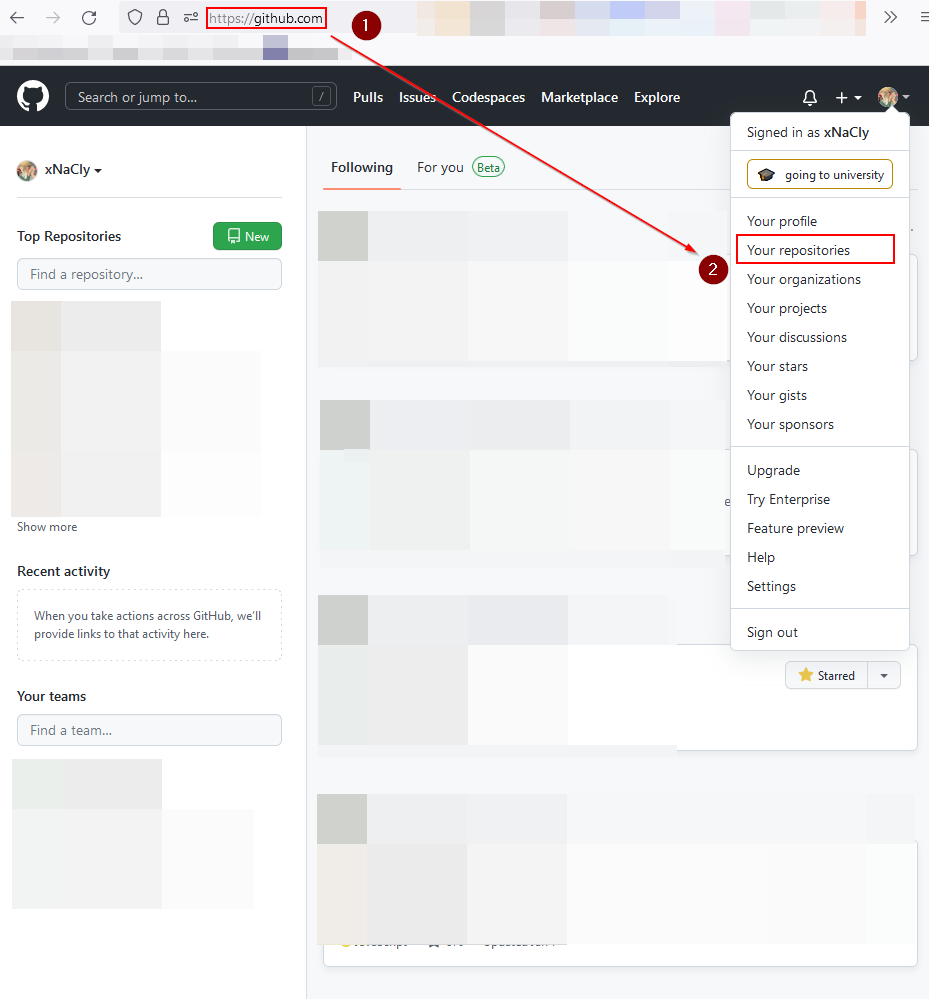
- Once navigated to the repository overview we simply click on the green
Newbutton in the top right corner: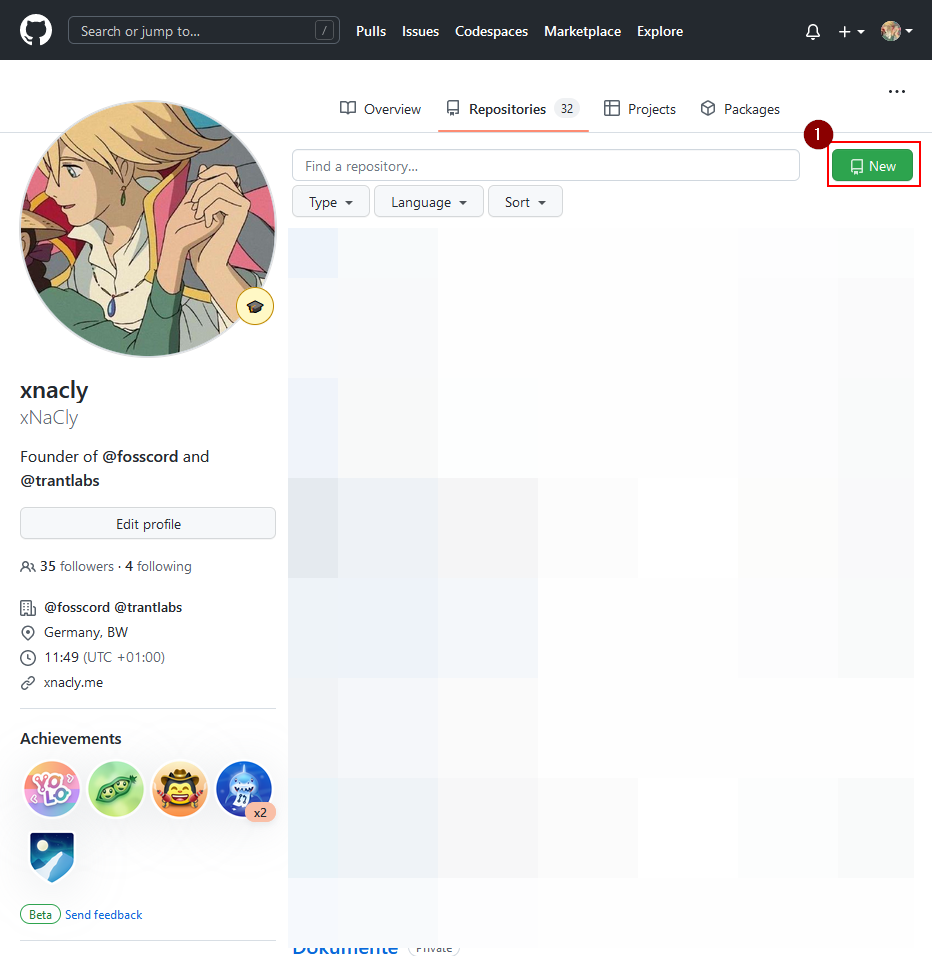
- Now we input a repository name (Sub step 1), a description (Sub step 2), select whether or not to make the repo public (Sub step 3) and tell github if it should create a README file in our repository (Sub step 4). After that we hit
Create repository(Sub step 5).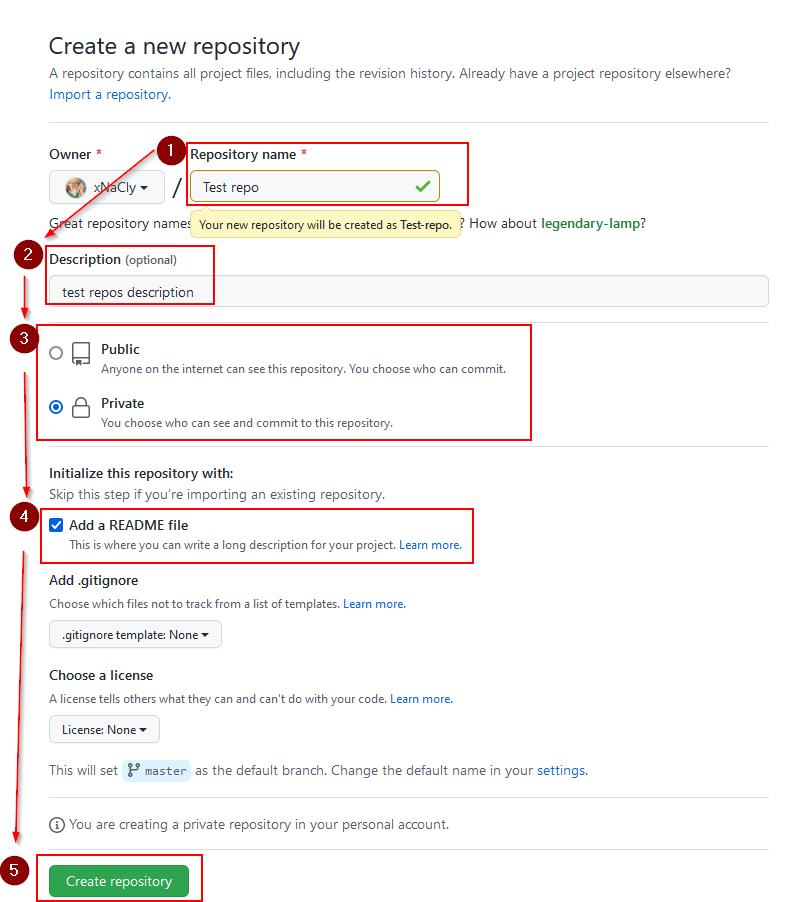
- For the following chapter we need the url to the project, either copy it from the url bar or follow the quick 2 step guide:
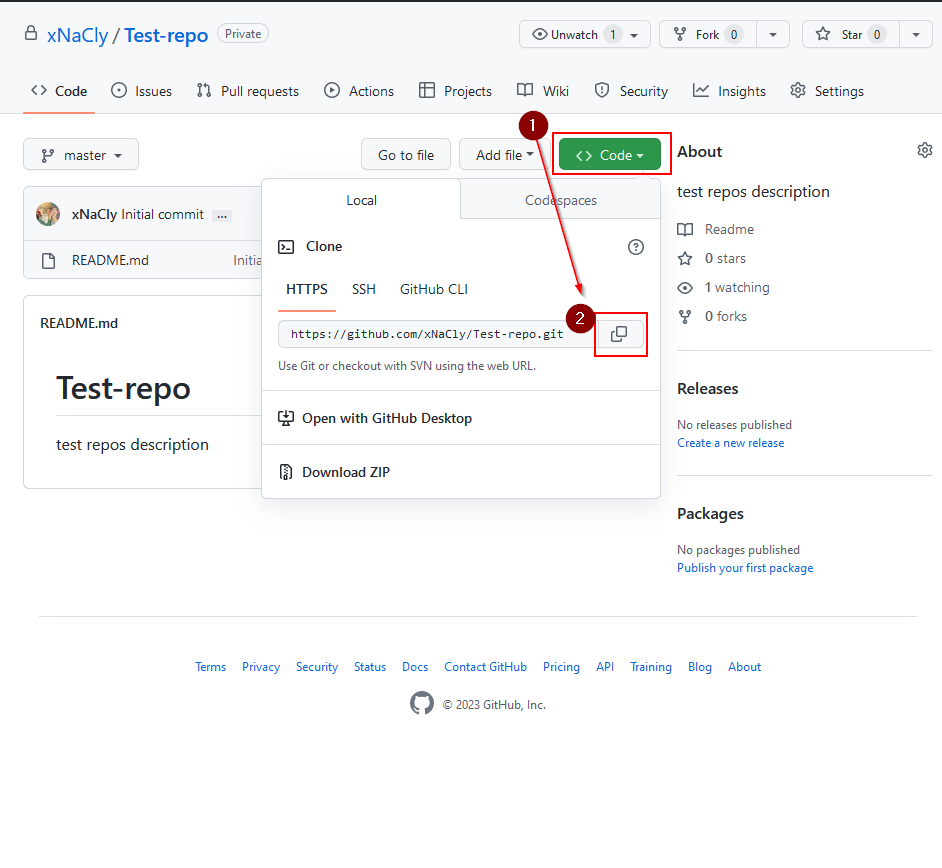
- click on the
Codebutton - click on the copy icon button next to the url to copy it
- click on the
Downloading (cloning) a project
Info
When cloning a repository, git downloads most of the data stored at the url, which includes past commits and filesTo clone a repository, one has to know the url of the repository and pass it to the git clone subcommand:
1# clone your newly created project:
2git clone https://github.com/<username>/<project>
3# copy the following and paste the url from the previous chapter at the end (keep a space between clone and your url)
4git clone
After cloning there will be a new folder in your current directory and there will be output on your terminal similar to this:
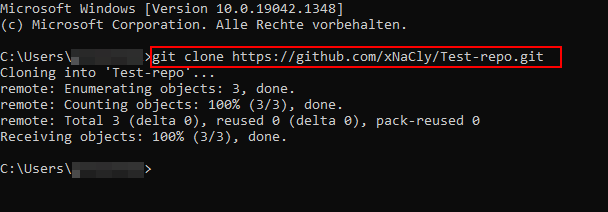
- Newly created directory:
- on linux:
~/<reponame> - on windows:
C:/Users/<user>/<reponame>
- on linux:
Making changes
Warning
To modify your newly created repository, you first need to clone your repo (see the previous chapter for help on that).We will now modify the Readme.md created by hitting the check while creating the Github repository.
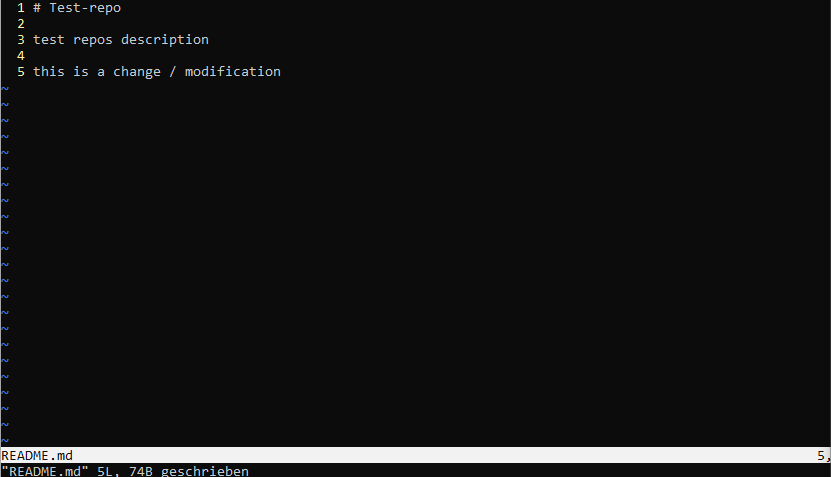
Open the README.md file in the directory on your system in any editor you want, for me its vim:
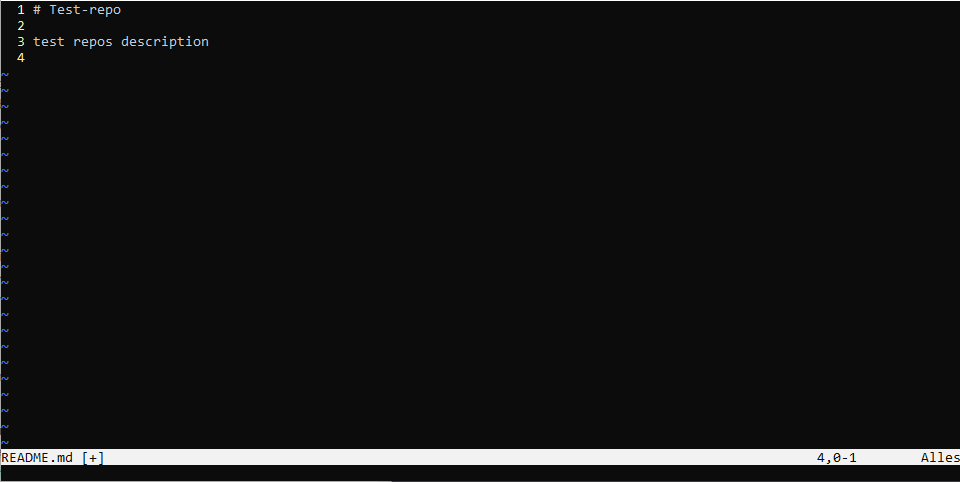
Make a change, save the file:
Tip
To view the changes you made run git diff in the directory which is the newly cloned repo.
Output of running git diff after i modified the README.md file:
 1diff --git a/README.md b/README.md
 2index 9716b1d..fe185f3 100644
 3--- a/README.md
 4+++ b/README.md
 5@@ -1,2 +1,5 @@
 6 # Test-repo
 7+
 8 test repos description
 9+
10+this is a change / modification
The diff highlights the changes made. Two empty lines and a new paragraph were added. (Additions are annotated with +, modifications with ~ and deletions with -)
Creating a commit
As i outlined in the introductory chapter a commit is a revision or a backup which we want to add to the repository’s history. This commit has a title and a list of changes which we made. A commits title should describe the changes made in it.
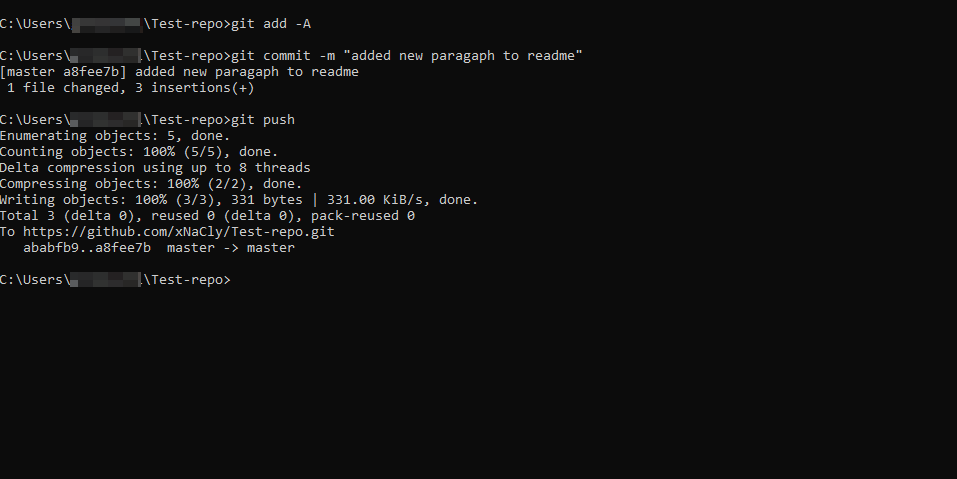
We modified the README and added a new paragraph, so we write exactly that in the commit title:
1# tell git what file to include in the commit we want to create
2# the -A flag tells git to include all modified files in the repo
3git add -A
4# git commit creates the commit with the changes we told it to include using git add
5# the -m flag tells git to set the following in "" as the commit message
6git commit -m "added new paragraph to readme"
The output of git commit highlights the changes we made as well as the commit title we specified.:
1[master a8fee7b] added new paragaph to readme
2 1 file changed, 3 insertions(+)
Uploading changes
To upload the commit we created we tell git to push:
1git pushResult:
Viewing the changes
After we made the changes, created a new commit and pushed it to the remote we can now go back to the web browser and reload the repository page:
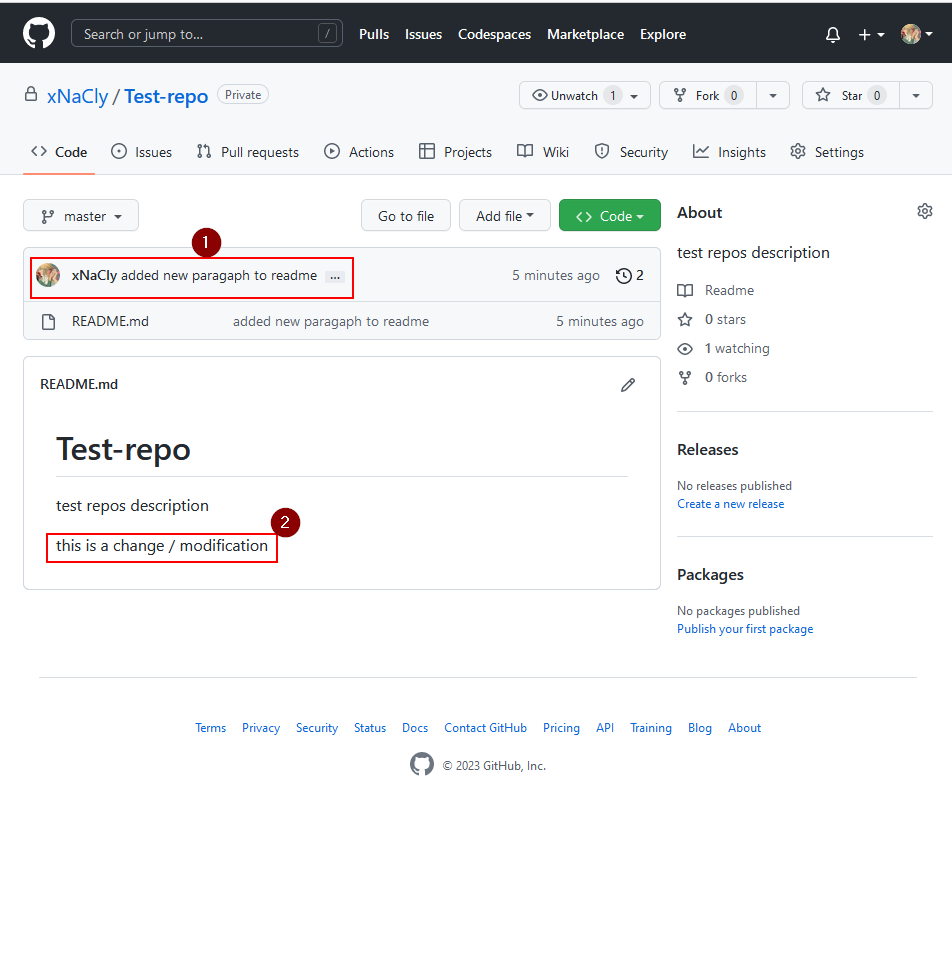
- take a look at (
1) which displays the last commit which was pushed to the remote, thats the commit we made - now look at (
2) which displays the change we made to the README.
Wrapping up:
Info
All of the above can be done using GitHub desktop which includes git and authenticates without having to use the terminal or remember any git commands.You are now able to
- understand the basics of git and github
- authenticate to github using git
- create a new repository
- create a new commit
- upload / push this commit to the newly created repository
- view these changes and the commit on github